
Projects:
GTO
My
67 Pontiac GTO
Trunk Body Work
-Trunk pans
-Wheel wells
Body Work Part 1
-Rear Quarters
-Rear Door Jambs
-Window Reveals
Body Work Part 2
-Cowl
-Pillar
-Rocker
Body Work Part 3
-Windshield channel
-Doors
-Fenders
GTO Paint
-Filler work
-Priming
-Blocking
GTO Frame Work
GTO Convertible Top Pt 1
-Top Frame
GTO Convertible Top Pt 2
-Top Trim
GTO Drivetrain
-Engine
-Quadrajet Rebuild
-Exhaust
-Axle
Muncie
Rebuild
popular
Auto to Manual Swap
1967
Ram Air GTO
story
Wheelhouse Filler template PDF
Willys CJ3A
CJ3A Intro
Engine and REBUILD
Drivetrain
BodyWork 1
BodyWork 2
BodyWork 3
BodyWork 4
Paintwork 1
Paintwork 2
Final Assembly
Final Assembly 2
Electrical System
Other Rods
TJ Wrangler Rubicon
CJ7
CJ8
Decrepid Dakota
Powerdyne Minibike
Allis Chalmers B engine rebuild Part 1
Allis Chalmers B engine rebuild Part 2
Allis Chalmers Generator to Alternator conversion
Gizmos
Stereo camera
rig
Stereo mic preamp
About:

Feeds

Markup
1967 Pontiac GTO Trunk Replacement
What follows is a glacially slow trunk installation. I started taking the car apart winter 2004. Every few months I'd do a little bit of work, but overall progress was very slow. However, in late '08, I went into "overdrive" and got this job done. This is where I did my first sheet metal welding. I'm glad I started my restoration with the trunk since it doesn't have to be perfect. Check it out (and click on the pictures for larger views)
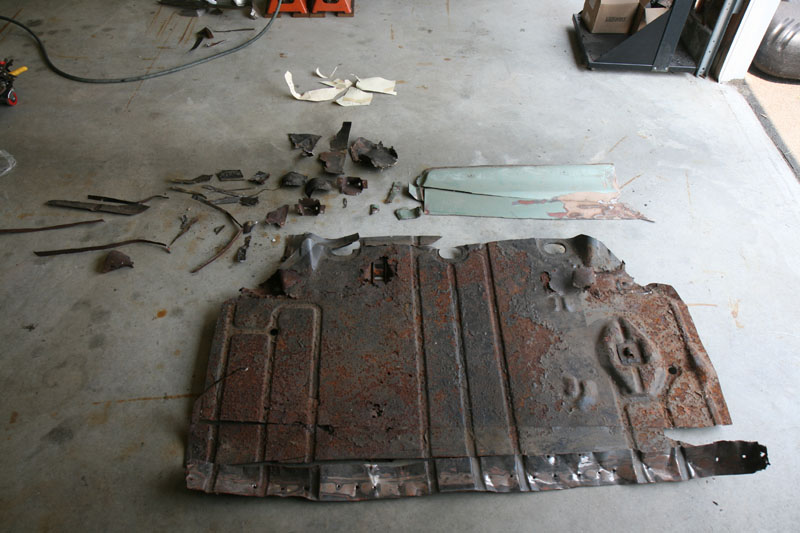
First thing was to take out the main trunk floor sections. I used many implements of destruction, but mostly used my 4 inch grinder with the 0.040" cutoff wheels. These work really fast, but don't last long. I cut out big chunks of floor so that they'd drop free. I left the edges where they're spot welded for more delicate removal after. I bought a complete trunk kit from Ames Performance, so everything including braces was cut out.
After the big chunks were cut out, it was easier to delicately (relatively speaking anyway) peel away the remaining sections from the good metal that was staying. For instance, I wanted to remove the trunk floor pan from the trunk extensions (the vertical filler pieces between the trunk floor and the rear quarter) without damaging them. I didn't want to drill out every spot weld and have lots of holes. Instead of drilling, I grabbed the unwanted metal with vise grips and peeled it off. I had enough leverage to pop most of the spot welds.

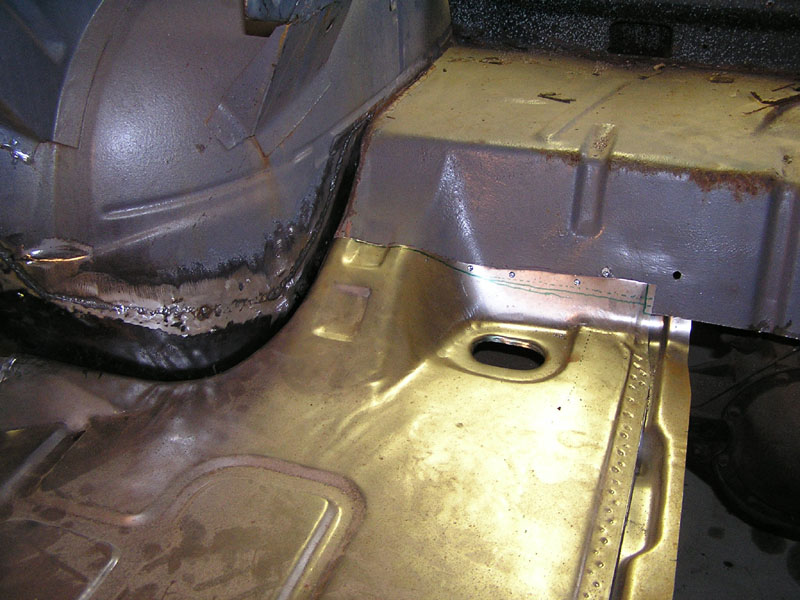
The rear part of the trunk pans are spot welded to the rear body brace which spans across the car and sits on top of the rear most body mounts. I wanted to make my pan seams here so you can't see the seams from under the car; it'll be hidden by the brace. In the picture, you can see how I have about 3 inches of pan I'm removing. These spot welds were beefy and while some were peeled away, I had to drill some of them.

The lowest sections of wheelwells that attach to the trunk pans were in bad shape, but beyond those areas, they were in excellent shape. Since you can't get convertible wells anyway, I decided to patch these wheelwell sections.
Here's the start of my very first patch on the lower part of the passenger inner wheelwell. I made manila folder cutouts and fit them to the repair area, then took them out to trace onto the replacement sheet metal.
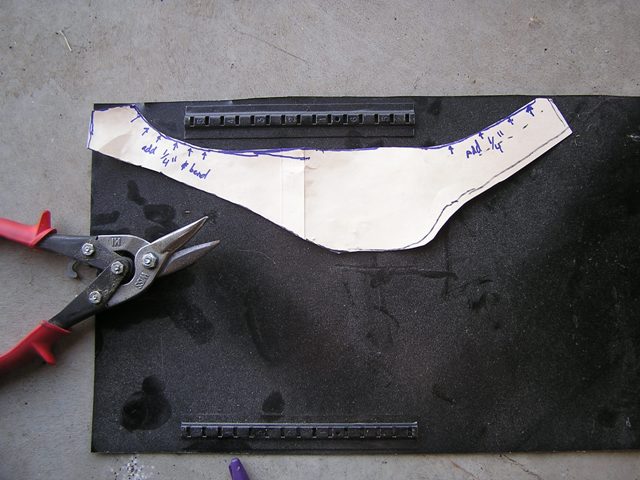
The patch has been cut out and shaping is underway. These need to have compound curves and on the right you can see a "bead" feature. I shaped the "bead" by pounding a piece of steel round stock onto the sheet metal.

The patch is welded in. I welded from inside the wheel well. I made the mistake of butting the patch up against the virgin metal with no gap. I've subsequently found that it is easier to have a gap between the metal when butt welding. The molten beads fall in between the gaps and fill in nicely. Of course you still have to do quick tacks. No long welds or the thin sheet metal heats up and you blow a hole through.
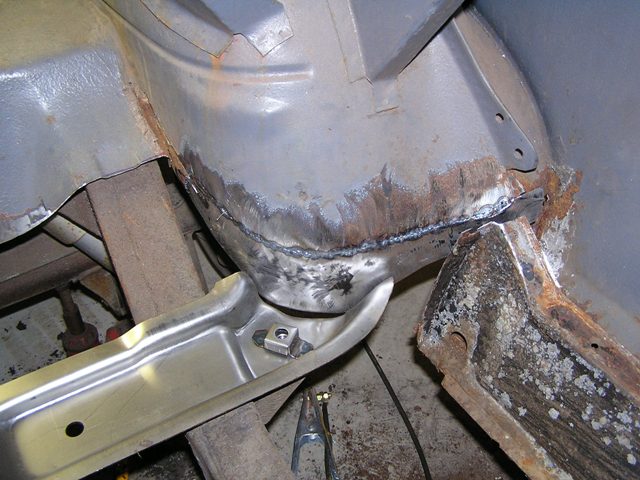
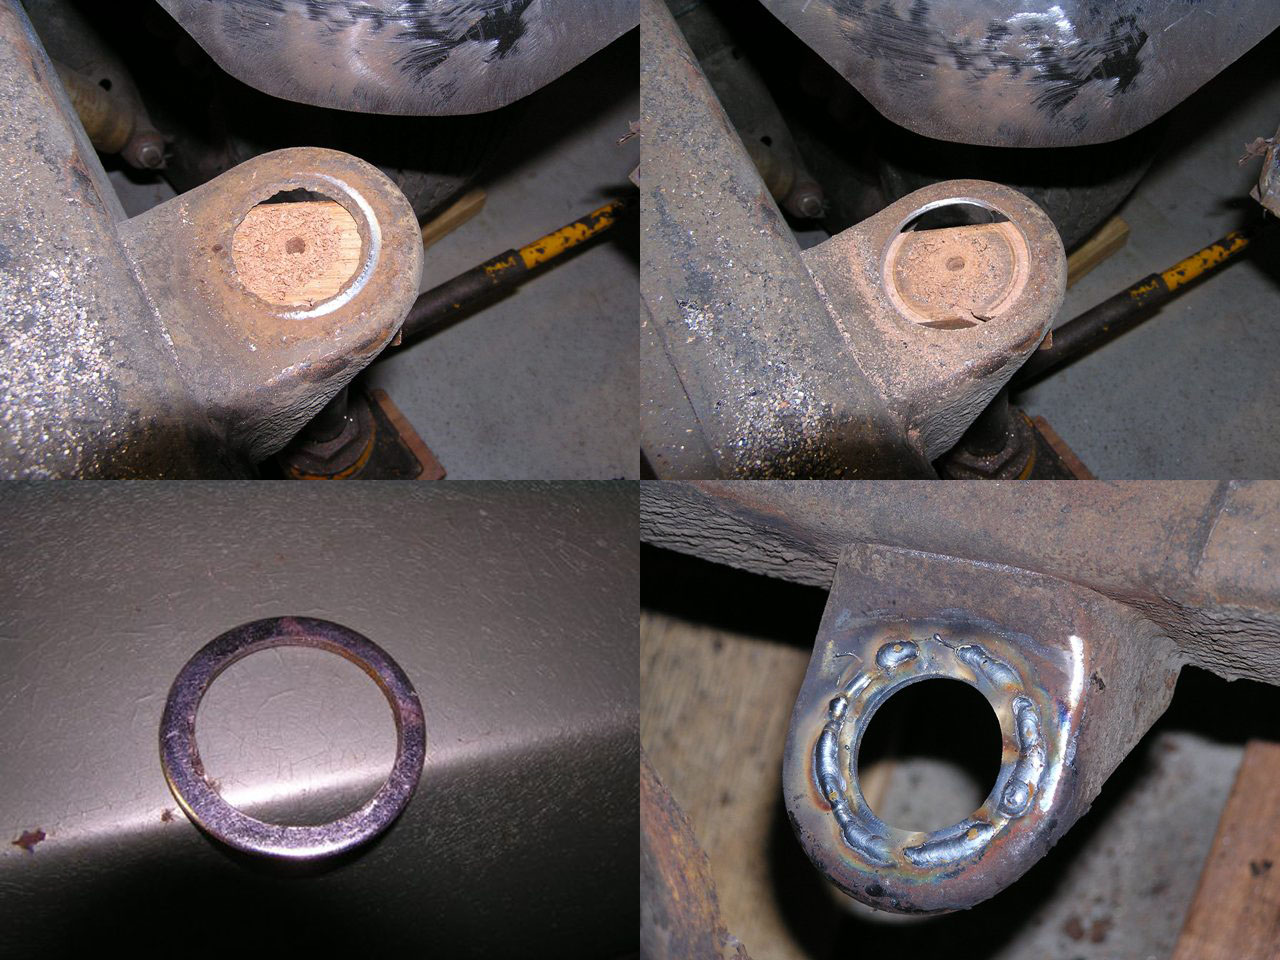
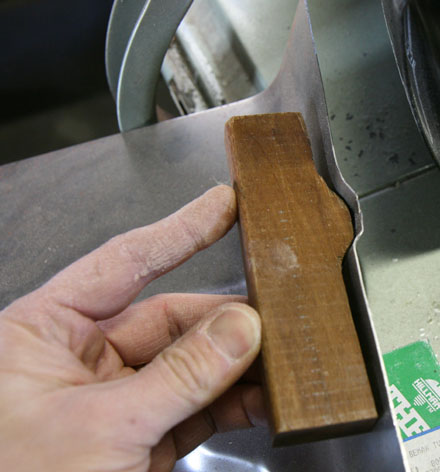
I finally got my first weld done so I thought it best to repair the body bushing frame mounts. The original mounts were thin where the rubber bushings resided for over 40 years and the hole I.D.s were rusted oversized. Rather than weld on big washers onto the mounts over the old metal, I wanted to cut out the thinned out damaged metal and butt weld new washer sections and grind smooth.
To cut out the damaged metal, I jammed a piece of wood into the bottom of the mount with a bottle jack and then used a 2" hole saw to drill out the mount. The wood served to pilot the hole saw arbor. I got some 2" washers that fit into the mounts, but the washer inside diameter was too small, so drilled out the washers with another hole saw to get the correct 1-5/8" I.D.
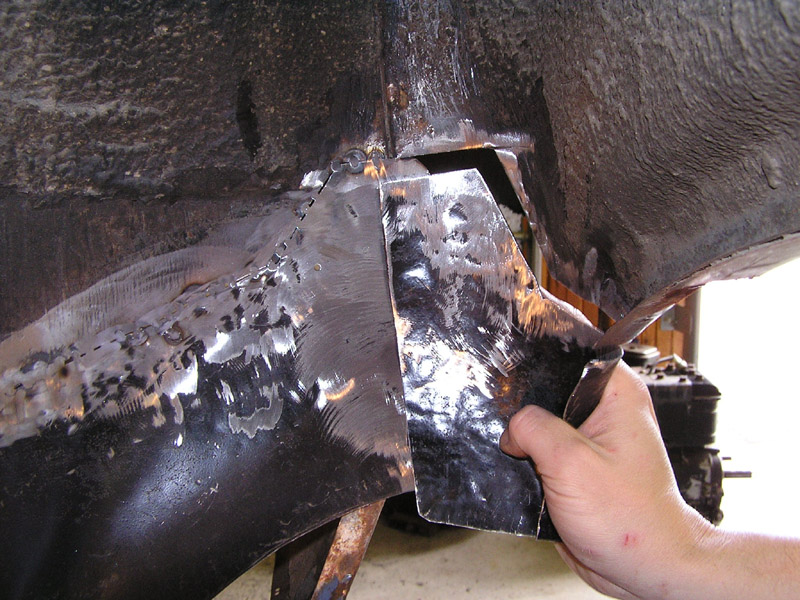
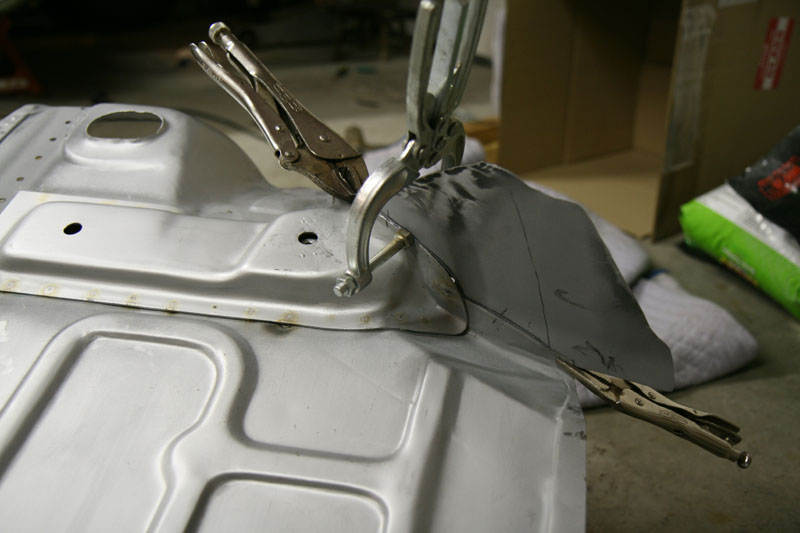
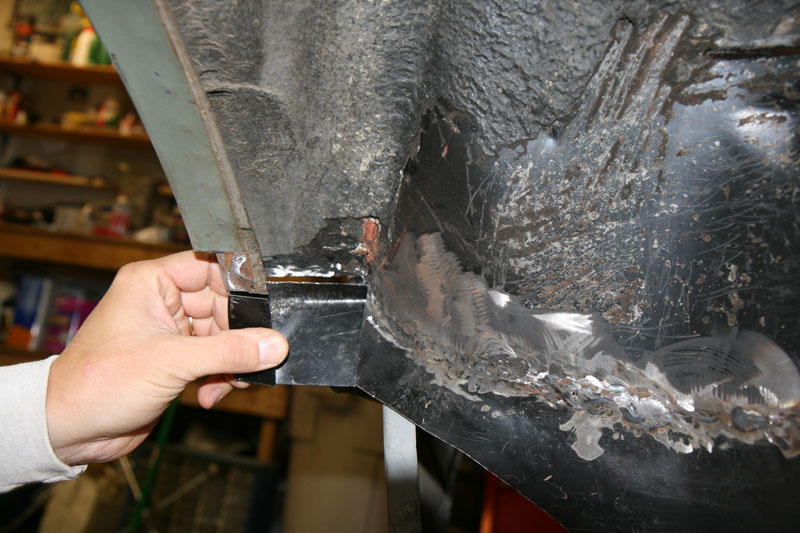
With both frame mounts done, I made a patch for the drivers side wheel well. It's much bigger than the passenger side described earlier. It's a compound curve piece which was not easy to form. But I got it beat to shape pretty closely. I decided to temporarily "lap joint" this patch over the old metal with pop rivets to really form it to a good original shape. When it was formed nicely, I used my angle cutter with the 0.040" blade and, starting on one end, sliced through both new and old metal so the new piece would fit perfectly against the old with a gap the width of the cutter.

The trimmed overlapping metal needs to be nipped and peeled away in short sections as you trim with the cutter and then weld. See the Mopar Muscle website which describes this cool technique.
You can see that the right side of this patch is still not trimmed and peeled away. The new metal overlaps the old at the top.
This is a view from the back (inside trunk). You can see I haven't cut the patch to form fit with the old wheel well metal yet. Notice the rivets holding the overlapped new and old together ready for cutting. Also note the funny looking vertical piece with the bolt...it's a temporary strut I made to keep the trunk extension in place while all this wheel well patching goes on. The bolt is going through a n existing hole in the wheel well flange.
Here is another view from the trunk. Notice the welding from the right, but the cut hasn't been made yet on the left. I'm ready here to cut through the patch and original metal on the left there. I'll drill out the rivet and I can bend away the the trimmed overlap piece. Note the poor welding. This is an example of how low on the learning curve I was at this point. I was blowing holes in the sheet metal when welding. At first, it's hard to keep the tacks very short time-wise; the longer the trigger is pressed, the heat builds up and holes are a result. In some cases, using a chunk of copper as a backer is helpful for filling the holes. Kinda messy learning, but that's why I started with trunk panels!
Here's a view from inside the wheel well looking straight toward the back of the wheel well. Notice the vertical seam (near top of picture; original metal) where the inner ww and the outer ww are joined. The inner and outer wheelwell sections are joined with an "L" lap joint all the way around until it gets to the point where my new patch is. The seam then turns into a flat lap joint. The original metal was rotted from here down. The new inner patch will correctly be over-lapped with a flat lap by the new outer wheel well patch shown a few pictures down. This is the way Pontiac did it.
From behind you can see I'm ready to remove the trimmed original metal. The patch will now fit in like a puzzle piece and be ready for butt welding.
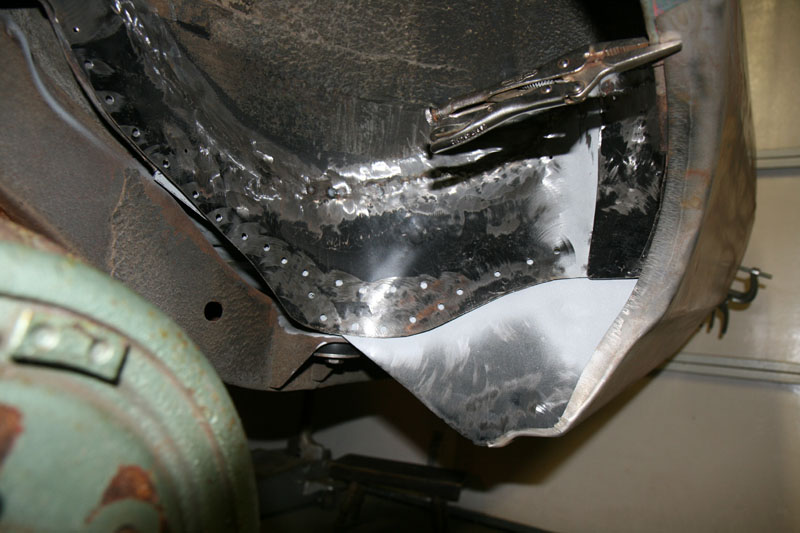
This is a view of the wheel well looking toward the front of the car. For the outer wheel well section repair, I decided to not do the overlap, rivet, cut technique with the patch as the area is too tigthly curved. I trimmed the rotten metal away and I'll custom fit a new patch in.
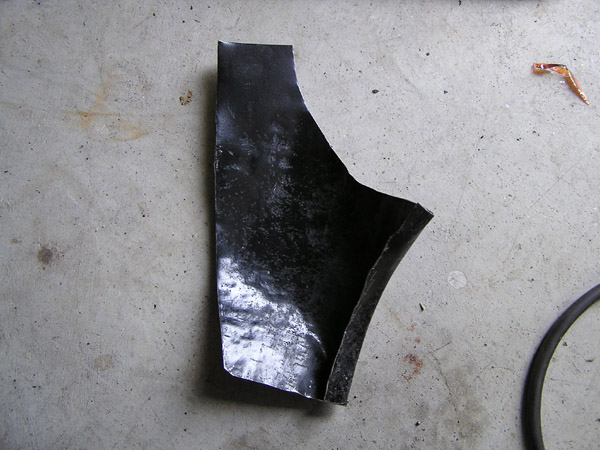
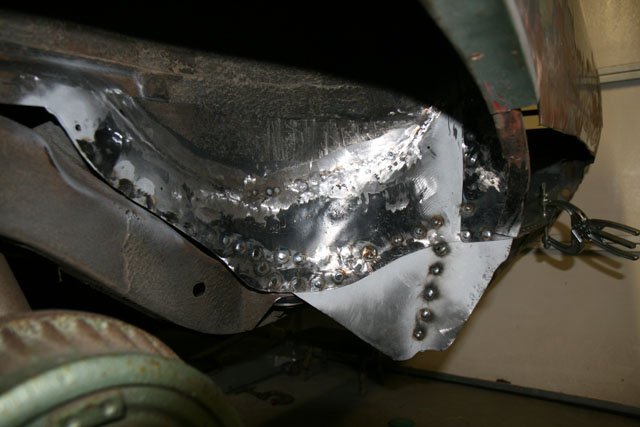
Here is the outer wheel well section patch. Still need to sand off the paint. I used a cheap body hammer set, a vise, vise grips, and whatever to shape the metal.
I'm fitting the new piece in. Notice that the left side of this patch is an overlap type seam with the inner wheel well section (as it was originally).
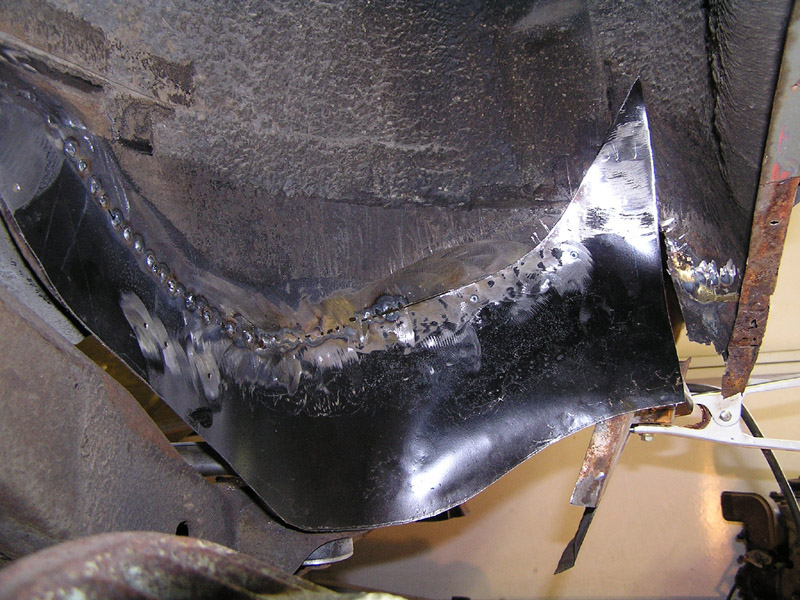
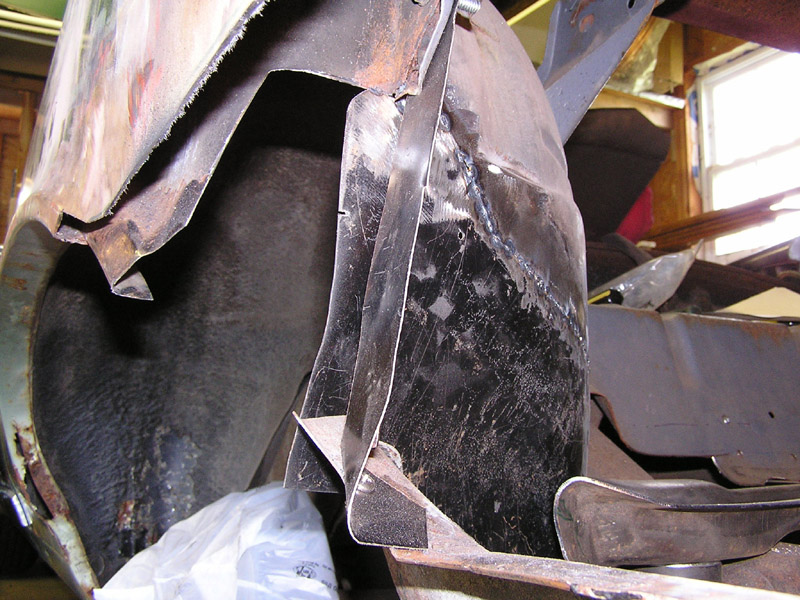
The outer ww patch is tacked in. Again, this is inside the wheel well looking toward the back. The gray on the inner patch is weld thru primer. I'll put in the lower triangular piece when I weld in the rear quarter patch. Ultimately I'd love to cover up this work with some Red Fender Liners.
Here is the almost-fully-welded-in patches viewed from behind.
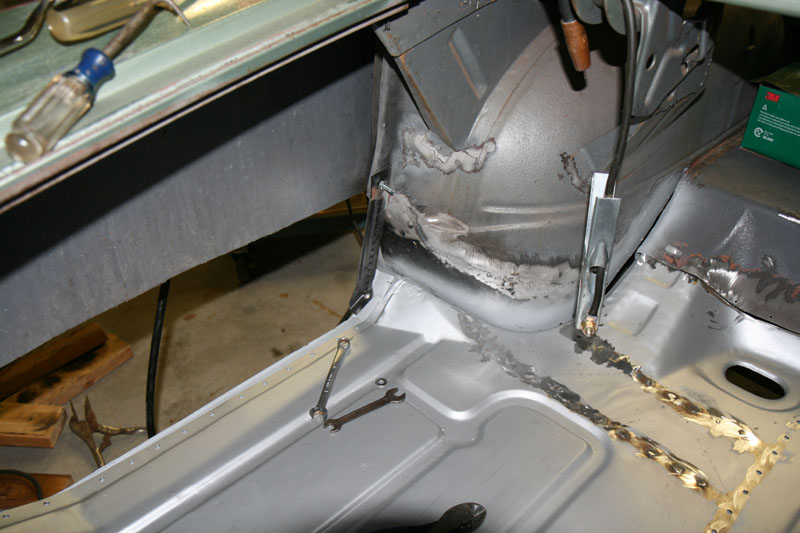
A view with the side to side brace fit up to the wheel well. I had to do a bit of massaging (beating and bending) of the brace to mate up nicely with the wheel well shape.
August 2008
Resuming work. The pan was roughly trimmed to have a small overlap with the original metal and screwed in. The remaining tweaks and fitting were done. Once the fit was good, I traced the outline of the crossbrace as well as the front to back braces on the underside of the pan.
I decided to weld the crossbrace to the pan out of the car. Here, the brace is plug welded to the pan.

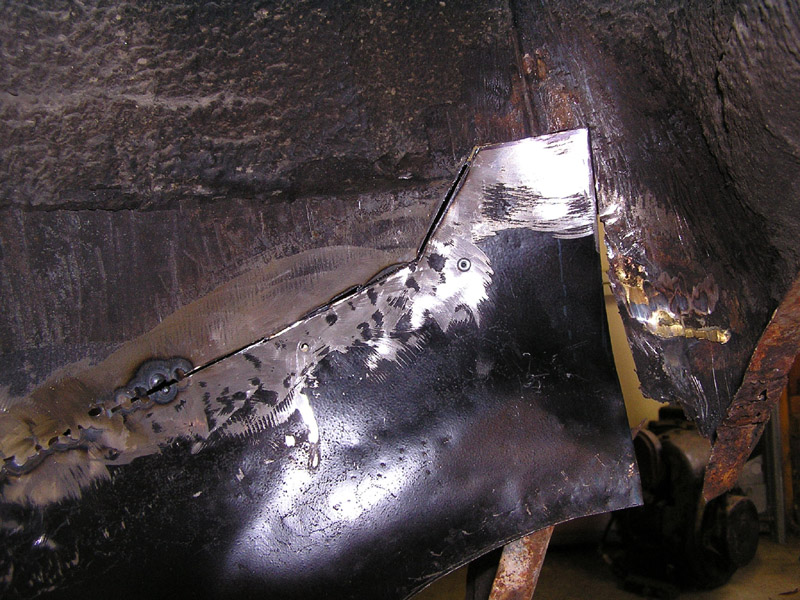
Pontiac A-body cars used a little triangle wheel well extension which tied the lower quarters to the wheel wells. Mine were pretty much swiss cheese, and since the pan was ready to go in, I decided to fab up this triangle. This involved yet again temporarily installing the pan/brace and rear quarter patch panel, then making a template with manila folder card stock. Then I took everything out, made up the triangle and welded it to the pan and brace assembly.
Here the trunk pan with the triangle patch is test fit into place. The quarter patch panel is test fit as well. Note I've also drilled the wheelwell sections in preparation of plugwelding to the pan and crossbrace.
Here's a view from the underside of the car.

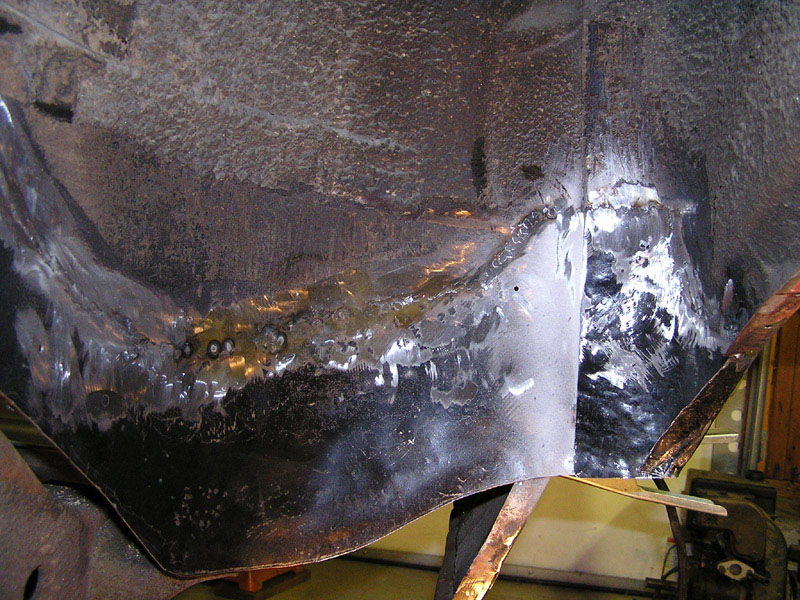
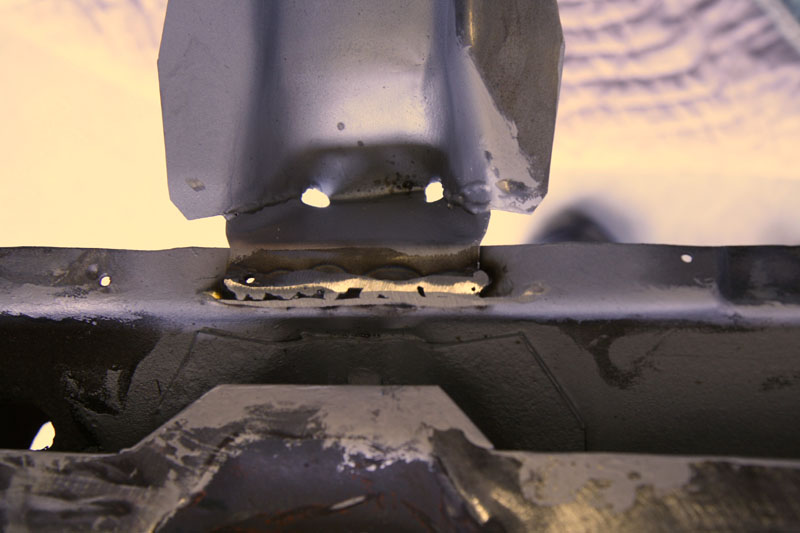
The main pan braces are welded in front and back.
The front is merely plug welded to the original pan.

A tab at the rear of each brace laps over the crossbrace in back. There are depressions in the original crossbrace flange to allow for the thickness of the tab of each trunk brace.
The pan has now been trimmed with a cut-off wheel. The cut-off wheel cut through both the new pan and the old pan underneath. The nice new 0.040" gap is just itching to be filled with weldment.
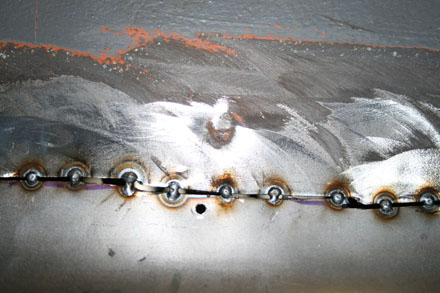
Here the pan leading edge has been mostly stitch welded in. I only welded the front edge at this point. I left the rear to float until the front is done. Any distortion from the front welding will be taken up by the lap weld on the back.

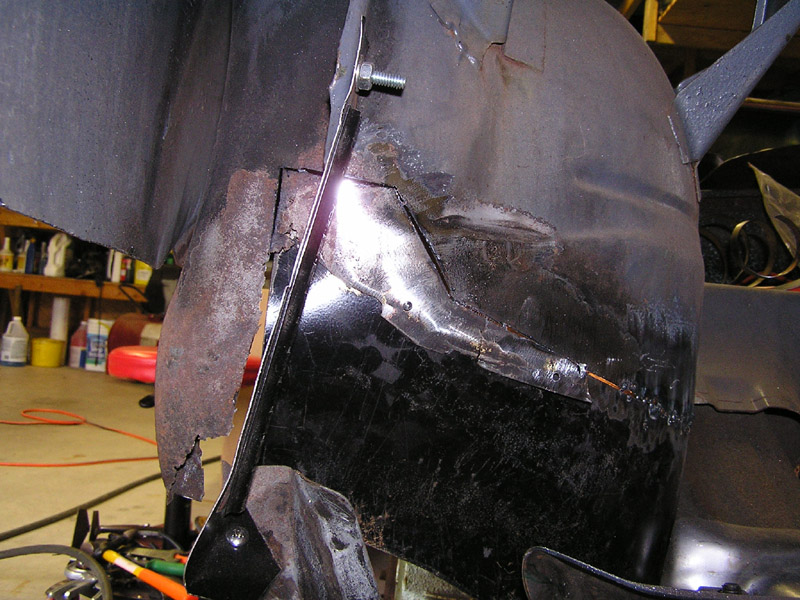
The wheel well has now been plug-welded to the pan, as well as the triangle patch to the vertical trunk extension.
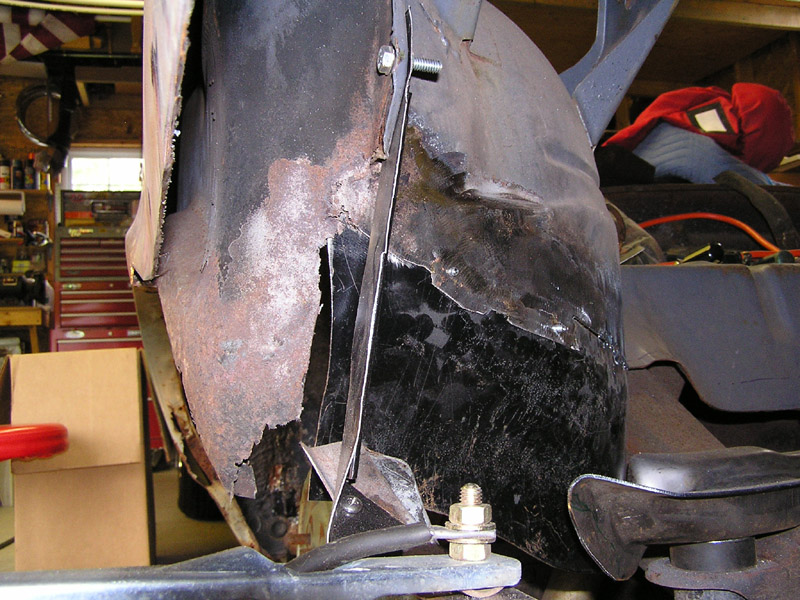
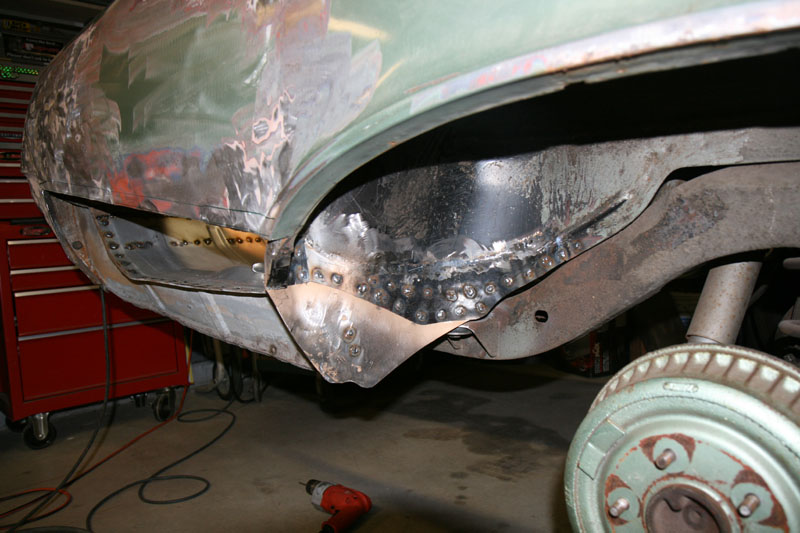
Here is a shot of the passenger side wheel well. The original quarter still has not had the rot removed, the remaining original triangle extension has not been removed, but the inner wheel well has been repaired.
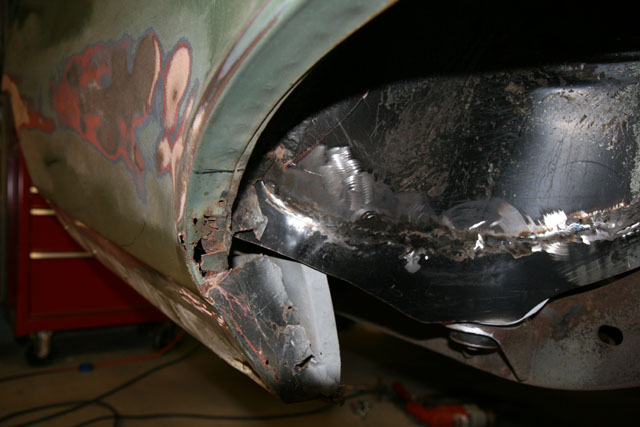
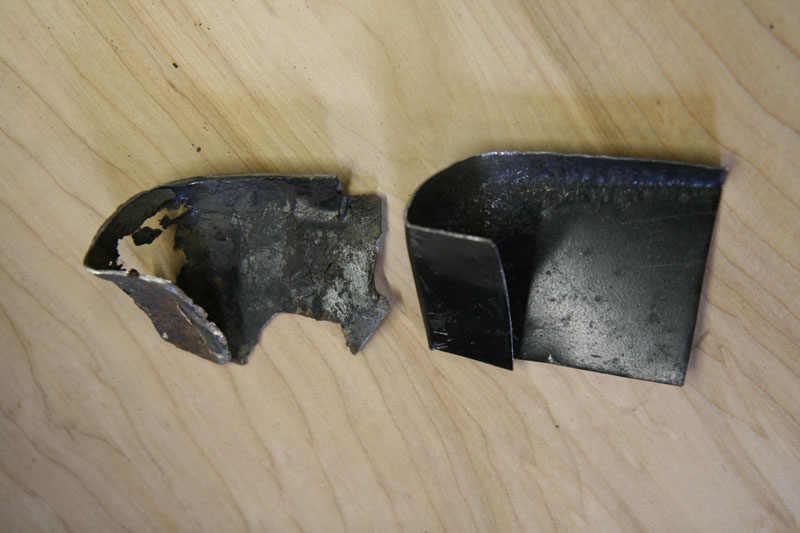
The very end of the passenger side outer wheel well had some rot damage so the tip was cut off and a new section fabricated.
The rotten quarter panel section has been cut out, and the outer wheel well patch is being test fit.
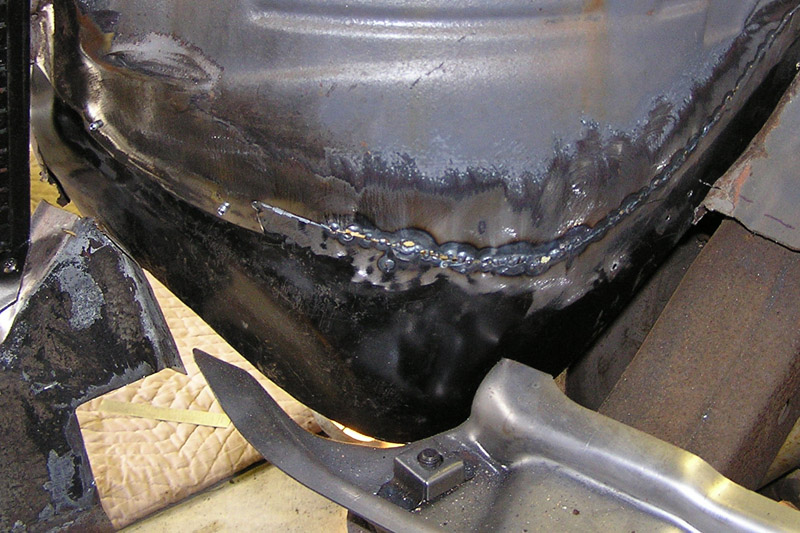
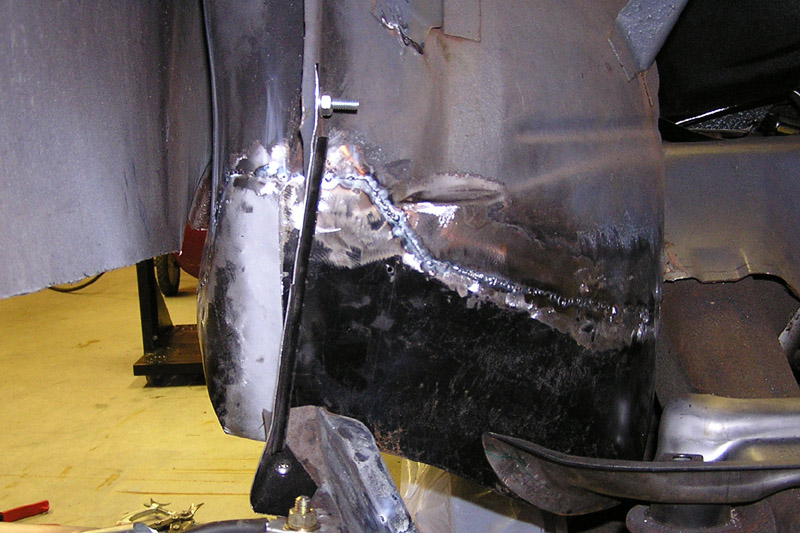
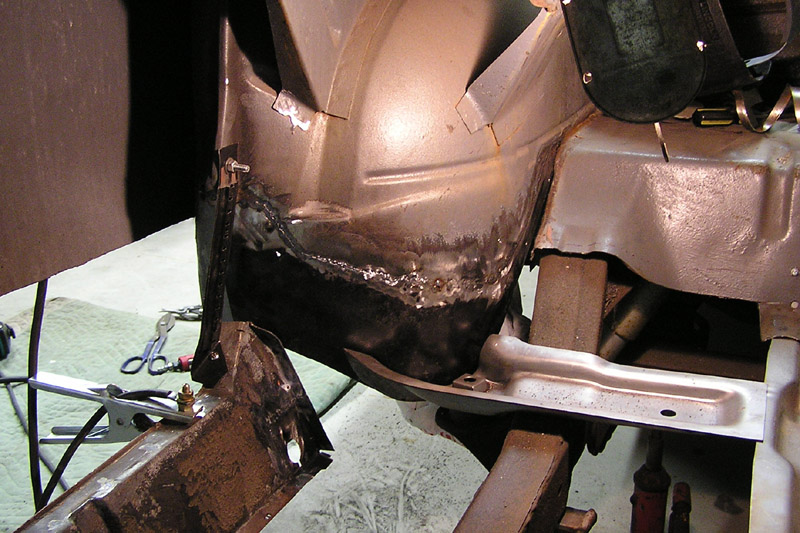
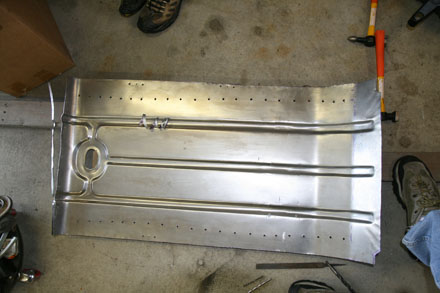
A good shot of the wheel well work done, as well as the wheel well extension and pan installed. The quarter panel has also had the damage removed.
The outer pans are now installed. Since the back of the pans were lap welded, I simply used sheet metal screws to get the pan screwed down tight to the old pan. But before that, I used a flanging visegrip tool to flange the old pan. I drilled the pans beforehand to plug weld to the main braces. Most parts were coated with Master Series coating which is good stuff. However, it does not like to be welded. I used a drill to grind off the coating from the base metal(but not drill through the base metal) when doing a plug weld. By the way, plug-welding (basically a simulated spot weld as the factory did) is quite easy as long as the holes in the top panel are about 3/16" diameter. Anything smaller and the weld doesn't penetrate easliy since the top panel sucks away alot of the heat. With a plug weld, I start the weld on the base panel and then spread the gun to the edges of the hole in the top panel in a circular motion. A very satisfying weld especially compared to butt welding.
Center Trunk Pan Installation
July 2009
The center pan has been prepped for installation. Firstly, the beads were not formed very well from the stamping factory. So I made a wood form out of Ipe wood and massaged the ugly shapes.
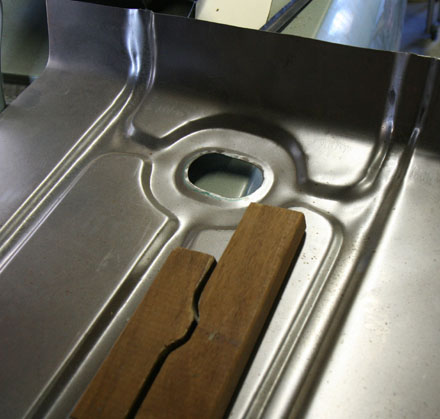
Here's a before and after:

The pan was then drilled in order to plug weld it to the braces:
Note the center plug region has been cut out.
The pan was then put in and screwed down to the original pan front edge and the new braces. The front edge of new pan/old pan sandwich was then cut with the 0.040" cutter and the remaining new/old butted pans then stitch welded.
It was really hot the day I was doing this and I got a little jiggy with the cutoff blade when the ice cream truck came around. My son bought me an ice 'scream sammich so I felt better. I can fix this slice with some more stitch welding. I'm getting better at this.
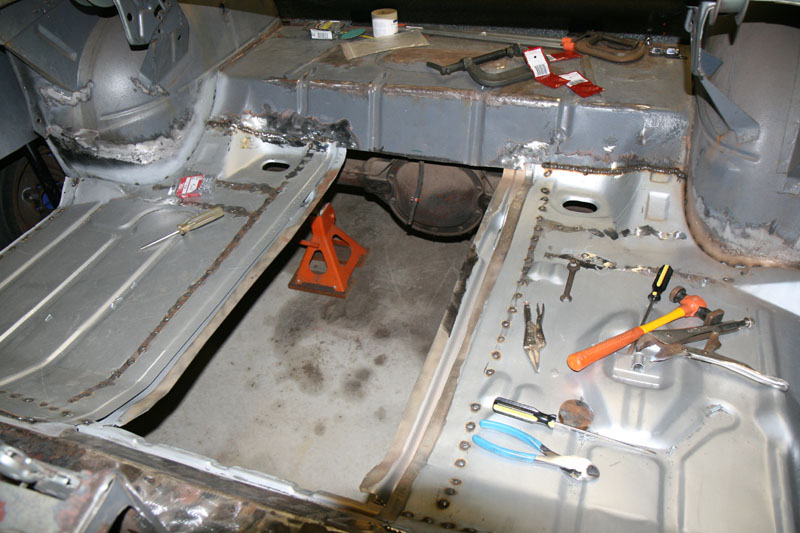
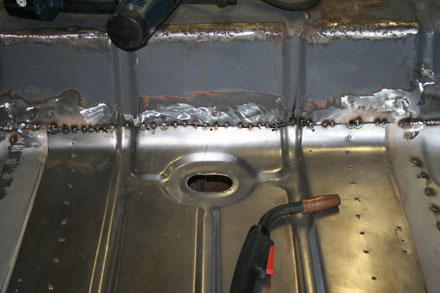
September 2009
Spent some hours finishing all the welding. Seemingly there are a few miles of welding required for a 7 piece trunk floor kit. But I got it all welded up, and then I spent a few hours grinding all the welds with a combination of an angle grinder, and a roloc disc mounted on an air grinder.
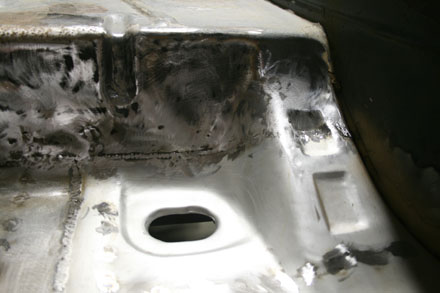
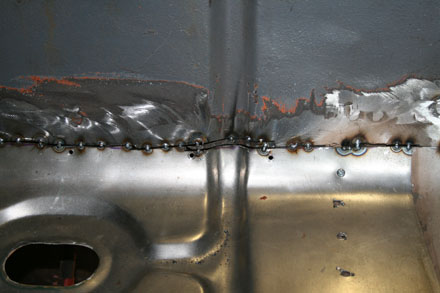
Some welds are lapped so there are some valleys where the two panels meet. I did not want to fill these areas with weldment, so I made sure I did the best to completely weld it all shut, then I coated the seams with Master Series primer. The MS primer will also fill the inevitable pinholes and voids.
I wanted to fill the seam areas with filler so I sanded the areas down to metal and spread some Rage Extreme body filler. This took a few coats to get these areas smooth to my liking.
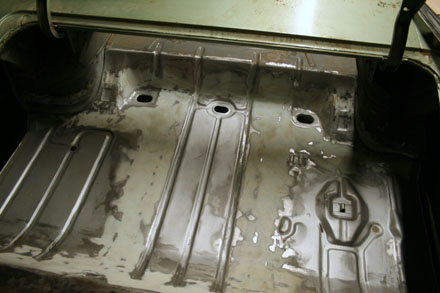
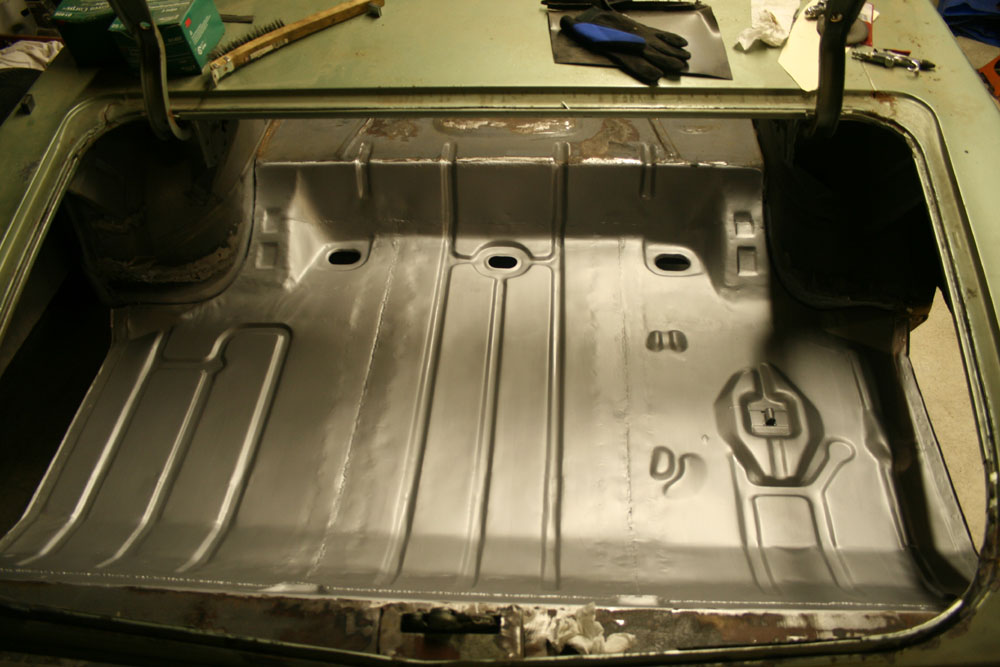
After smoothing the filler, another coat of Master Series primer was applied. Here it is pretty much ready for epoxy primer and then spatter paint. I still have to smooth the wheel wells where they've been repaired. I'm going to some other body work first.
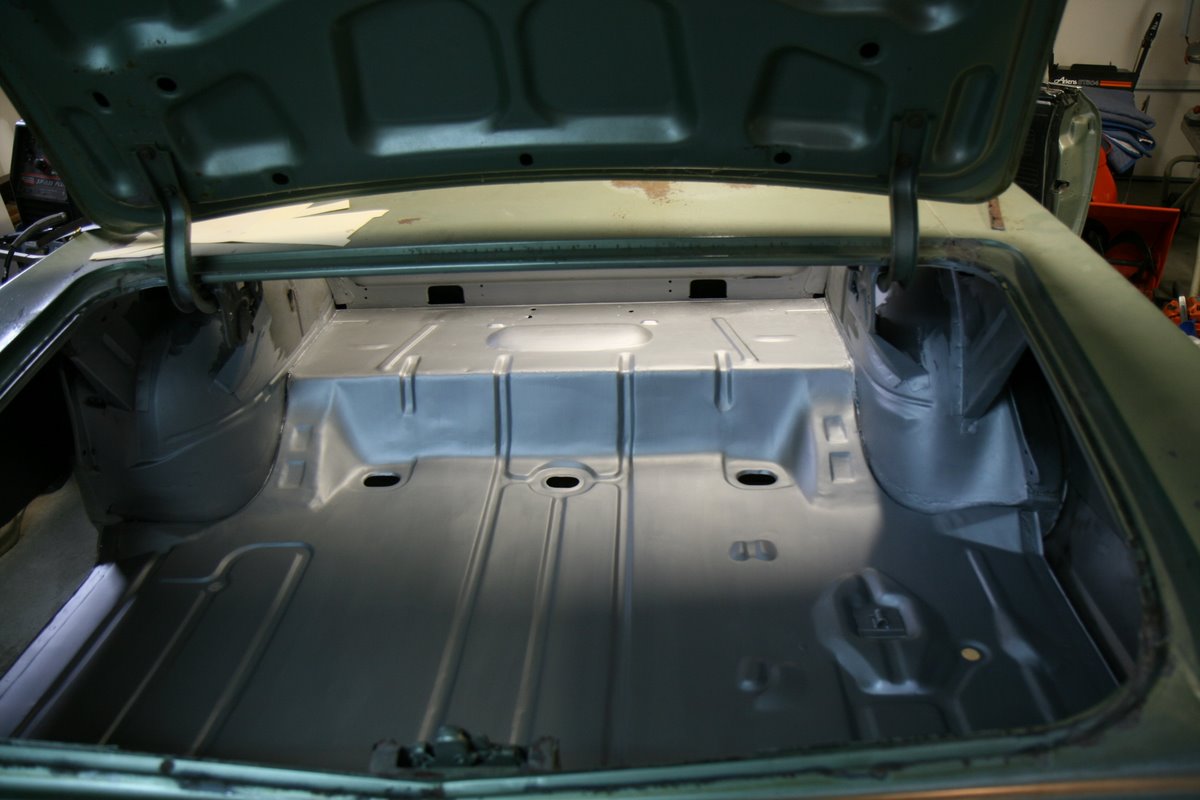
Spatter Paint
November 24, 2012
Despite the trunk bodywork being finished for a long time, I only recently got around to laying down some spatter paint. When it comes to spatter paint, you can either get the stuff in the rattle cans, or you can get quart cans made by a company called Zolatone and spray it with your own gun. I've seen rattle can jobs and they look nice, but the spots seem to be very fine and the texture is very heavy, so I thought I'd try the Zolatone stuff. I bought a quart of the Black/Aqua Zolatone which I believe is correct for '67 Pontiacs.
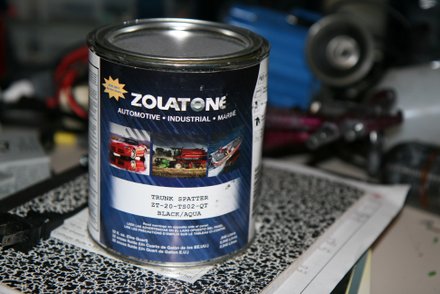
Using Zolatone requires a big tip spray gun, such as a primer type HVLP. But some folks have reported using a cheapie Harbor Freight spray gun with a drilled out tip works just as well. I happened to have an old HF gun, so I drilled out the tip with a 2mm drill.
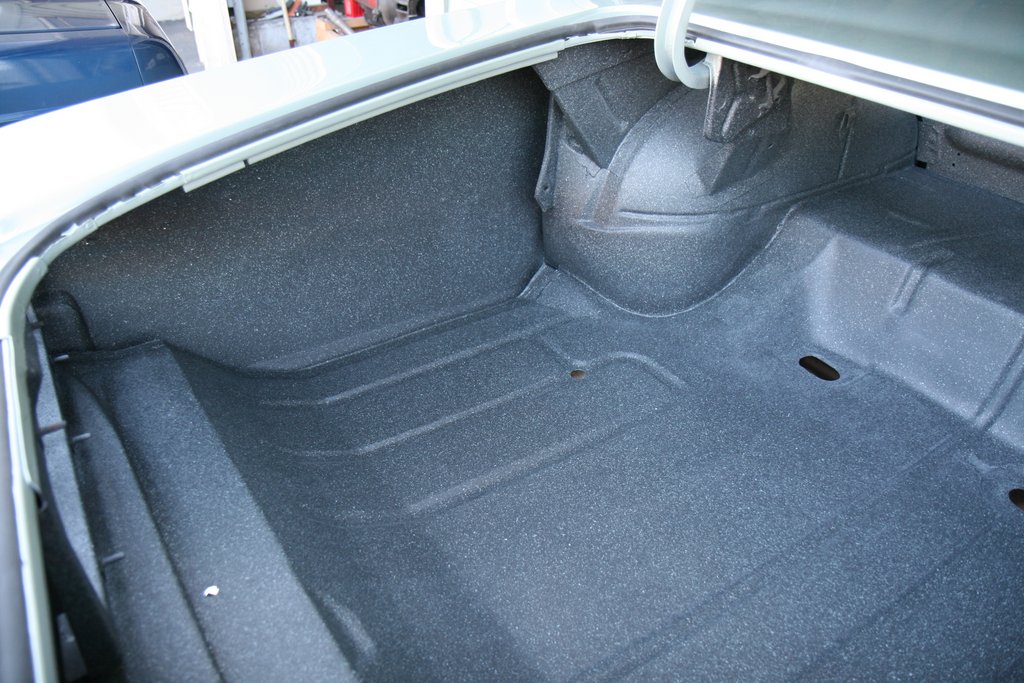
With the equipment ready to go, the trunk was prepped and masked off, and the Zolatone mixed according to directions. It's weird stuff and you must mix it carefully. It sprayed on beautifully, and in a way, seems almost impossible to mess up. I did end up using most of a quart. It goes on thick, but dries to a thin finish with no lumpy texture. It took a good day to thoroughly dry. I couldn't be happier with the results.
For more info on the restoration, check out the work on the Body Work Page.
Links
SFS
Links:
Willys Jeep CJ3A Forum
There exists a nice set of webpages for CJ3A's. It's got a forum too that caters to both '3A's and CJ3B's. It's a great resource, and frequented by very knowledgible folks.
1967 GTO Original Owner
These two videos feature an original owner GTO. This car was featured in Hemmings Muscle Cars magazine a couple years ago. Part 2 has inside and outside shots of the owner driving the car. Very nicely done.
Blues Maker
"Mississippi" Fred McDowell. One of the great Bluesman. This is a documentary made in 1969.
Pinstripes
Pinstriping the ol' fashioned way. Pretty nice.
MGB Racecar
I've always liked MG's. Watch this MGB lift it's inside tire a few inches off the tarmac when going "'round the bend". Awesome.
Pepsi Throwback
Pepsi has put out a "limited edition Throwback" version of Pepsi with REAL sugar, instead of high fructose corn syrup which has been used since the 80's. Holy cow there IS a difference; it's WAY better. Find some quick!