
Projects:
GTO
My
67 Pontiac GTO
Trunk Body Work
-Trunk pans
-Wheel wells
Body Work Part 1
-Rear Quarters
-Rear Door Jambs
-Window Reveals
Body Work Part 2
-Cowl
-Pillar
-Rocker
Body Work Part 3
-Windshield channel
-Doors
-Fenders
GTO Paint
-Filler work
-Priming
-Blocking
GTO Frame Work
GTO Convertible Top Pt 1
-Top Frame
GTO Convertible Top Pt 2
-Top Trim
GTO Drivetrain
-Engine
-Quadrajet Rebuild
-Exhaust
-Axle
Muncie
Rebuild
popular
Auto to Manual Swap
1967
Ram Air GTO
story
Wheelhouse Filler template PDF
Willys CJ3A
CJ3A Intro
Engine and REBUILD
Drivetrain
BodyWork 1
BodyWork 2
BodyWork 3
BodyWork 4
Paintwork 1
Paintwork 2
Final Assembly
Final Assembly 2
Electrical System
Other Rods
TJ Wrangler Rubicon
CJ7
CJ8
Decrepid Dakota
Powerdyne Minibike
Allis Chalmers B engine rebuild Part 1
Allis Chalmers B engine rebuild Part 2
Allis Chalmers Generator to Alternator conversion
Gizmos
Stereo camera
rig
Stereo mic preamp
About:

Feeds

Markup
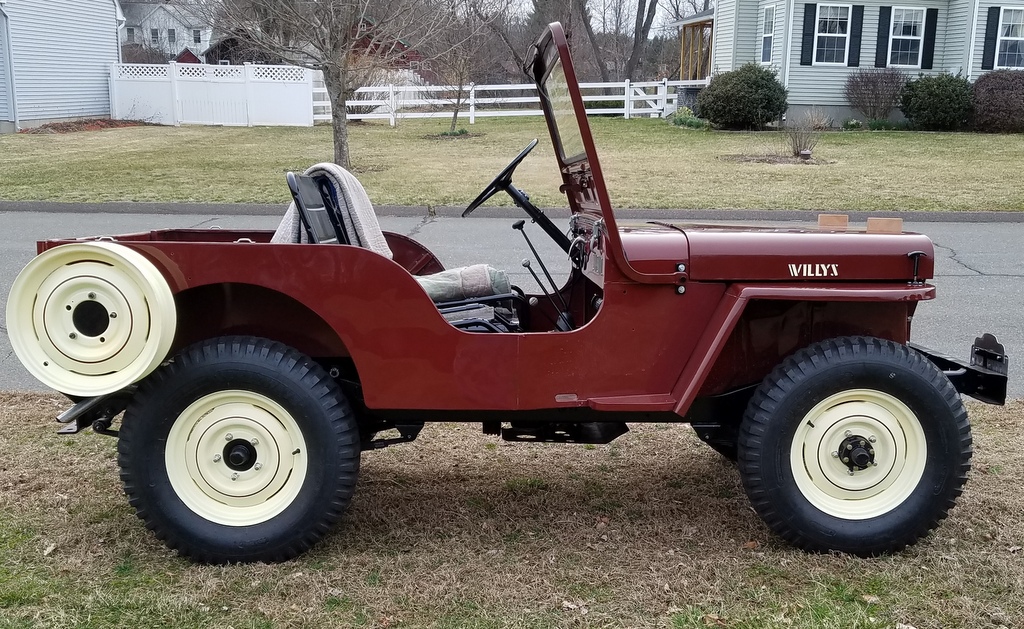
1950 CJ3A Final Assembly
This features the assembly of a 1950 Willys Jeep CJ3A after an extensive rebuild. Scoll down for latest updates.
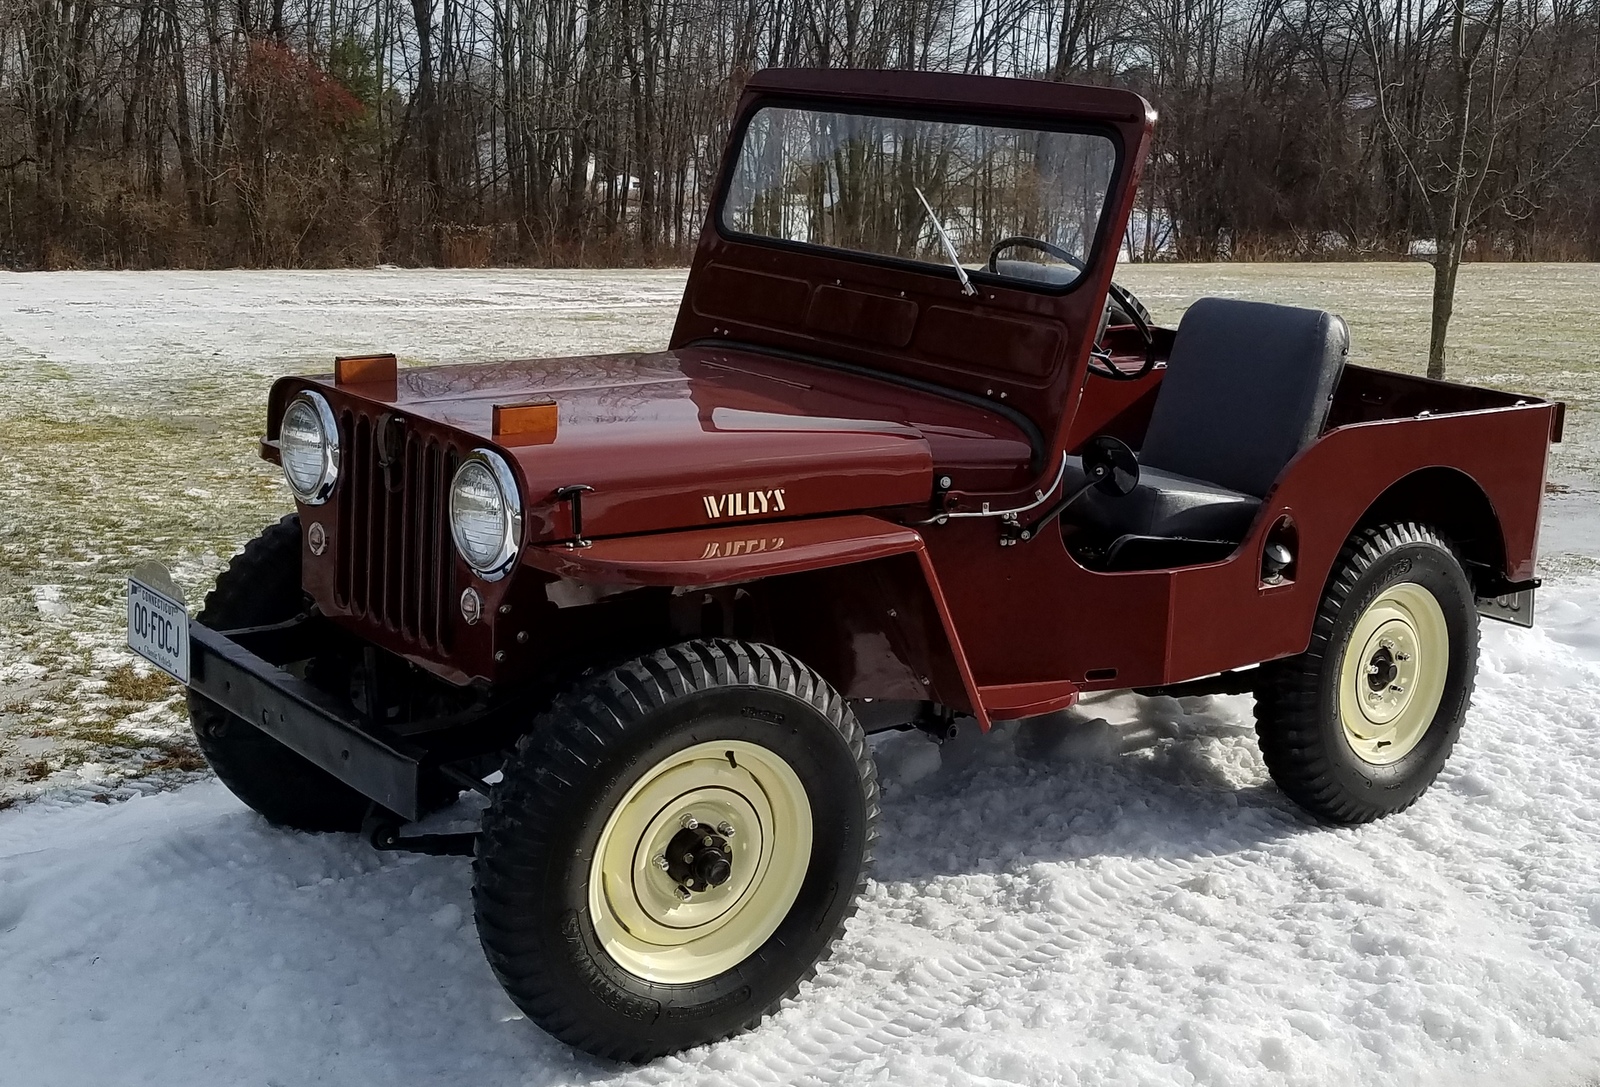
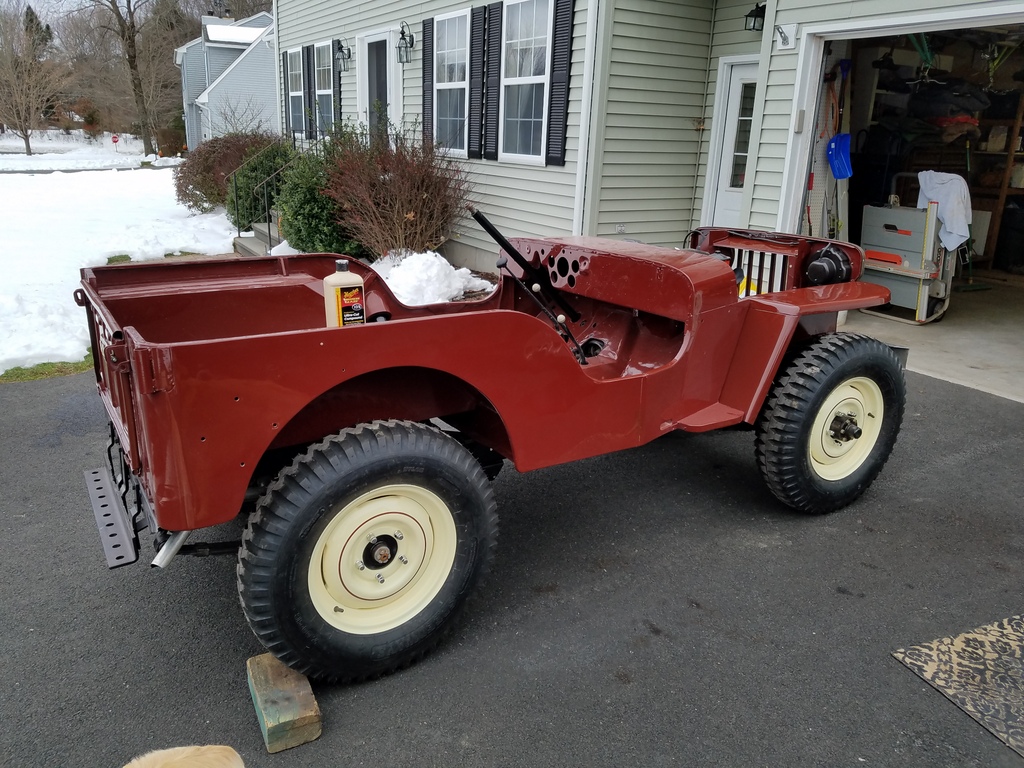
January 2020
Fully assembled Jeep teaser shot:
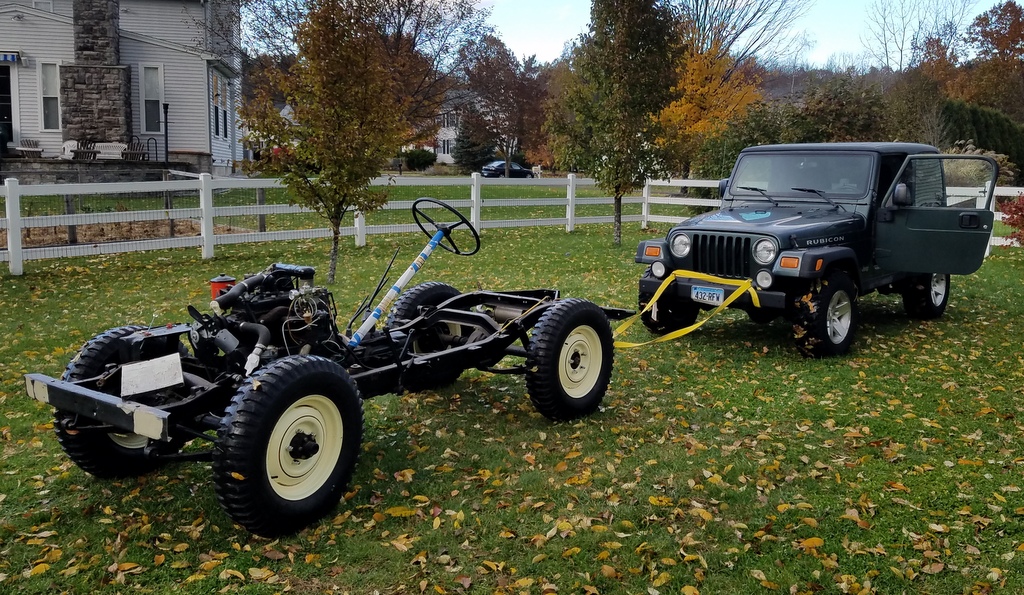
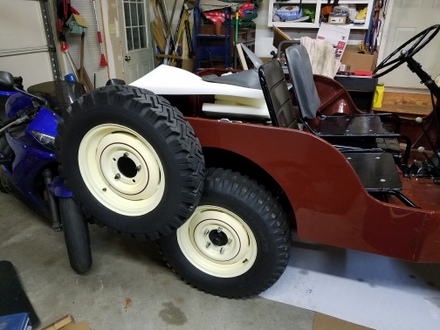
But wait, here's how the "final assembly" started:

CJ3A Assembly
After years of restoration work on the various subassemblies of the CJ3A, it's finally time to put it together!
It should be noted that I actually fully assembled the Jeep (picture above) before I painted the tub in order to get the Jeep registered; I thought it best to go no further with restoration until I was sure to get it "legal" in my name. The Jeep had been "off-grid" for decades and my paperwork was rather scant, so I was a bit worried. To start the process, I needed to have it inspected as a complete vehicle. I put insurance on the Jeep and trailered it (not allowed to drive it until this part is done) to a certified inspection station armed with Bob Westerman's CJ3A book which describes quirks pertaining to CJ3A's. For instance, the inspector wanted to see a second serial number, but he accepted my explanation about 1950 CJ3A's having only one S/N. After some more nerve wracking questions at the DMV, it was a relief to ultimately obtain a registration. (There are no titles issued for older vehicles in Connecticut). It's a "go" to finish the restoration.
That exercise was a ton of work, but a boon in some respects because I completed alot of the tedious work without endangering fresh paint: I designed and built an electrical system, plumbed and installed a fuel system, restored the gauges, and fixed the seat frames. After I got the registration and plates, I immediately tore the Jeep apart to finish up the metal work and do the final painting.
With all that cosmetic work finished, it was time to re-unite the tub with the chassis for the last time. The chassis was stored up on blocks in my backyard so it was exciting to bolt on the freshly shod wheels and pull it up to my garage.
Before it made it all the way I gathered up some folks and we dropped the tub onto the frame.
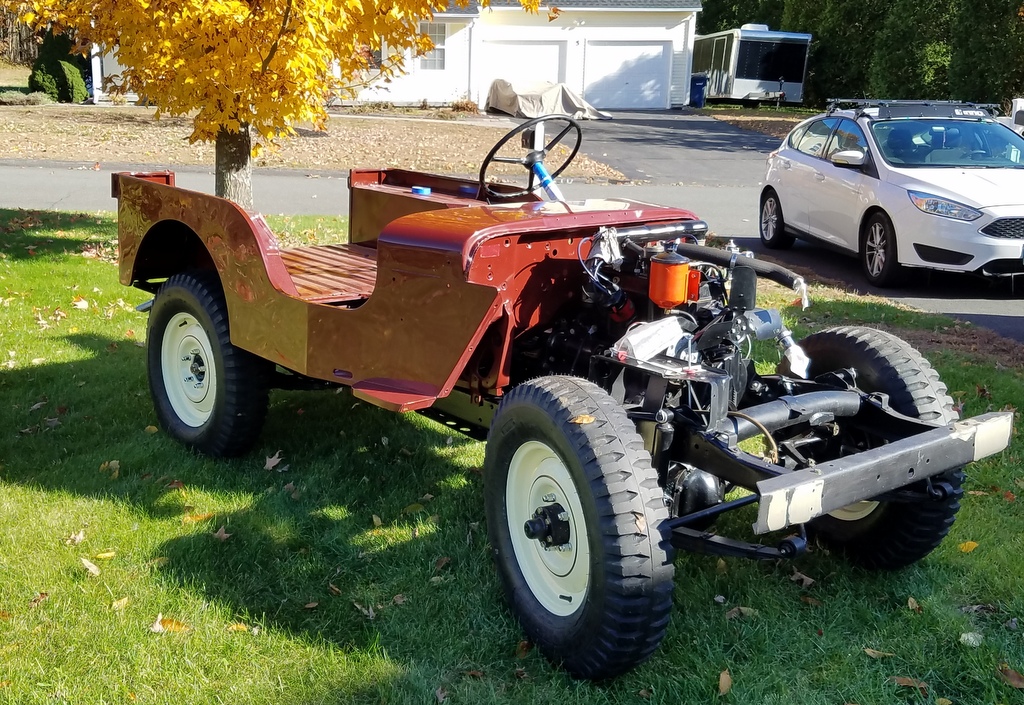
The tub was negotiated over the steering column and placed onto insulators (mounts) crafted from conveyor belt material sourced from Amazon. The conveyor belting is about 1/4 inch in thickness. Holes were cut by pressing a steel spacer with a sharpened edge into the rubber with a vise.

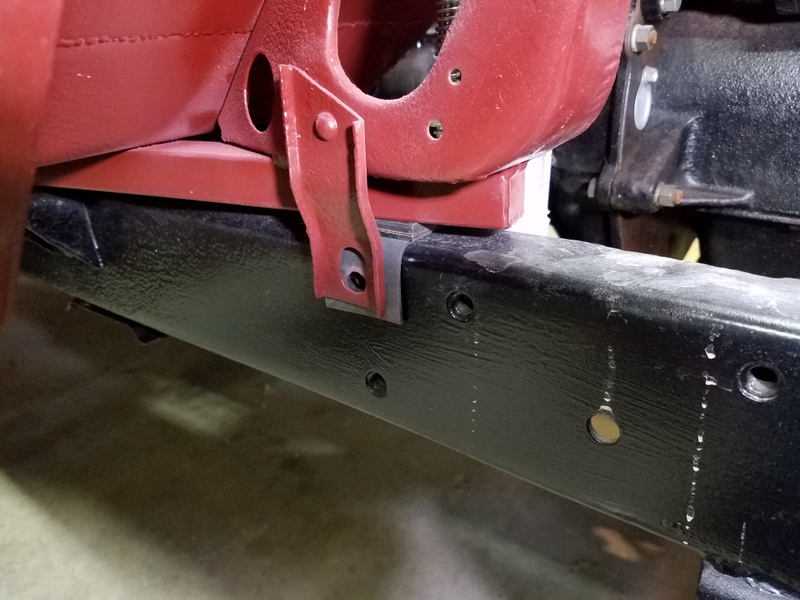
I was not sure how the original front "hat channels" were insulated from the frame, so I just used one of the insulators I made above and sandwiched a rubber flap (rubber sheet sourced from McMaster Carr) to it with rubber cement and folded the flap down the side of the frame to insulate the front tub bracket mount from the frame. Note the "flap" in the picture below.
I used grade 5 hex bolts, nuts, washers and lock washers to hold the body tub down. Loctite on all the bolts should help keep things in place too.
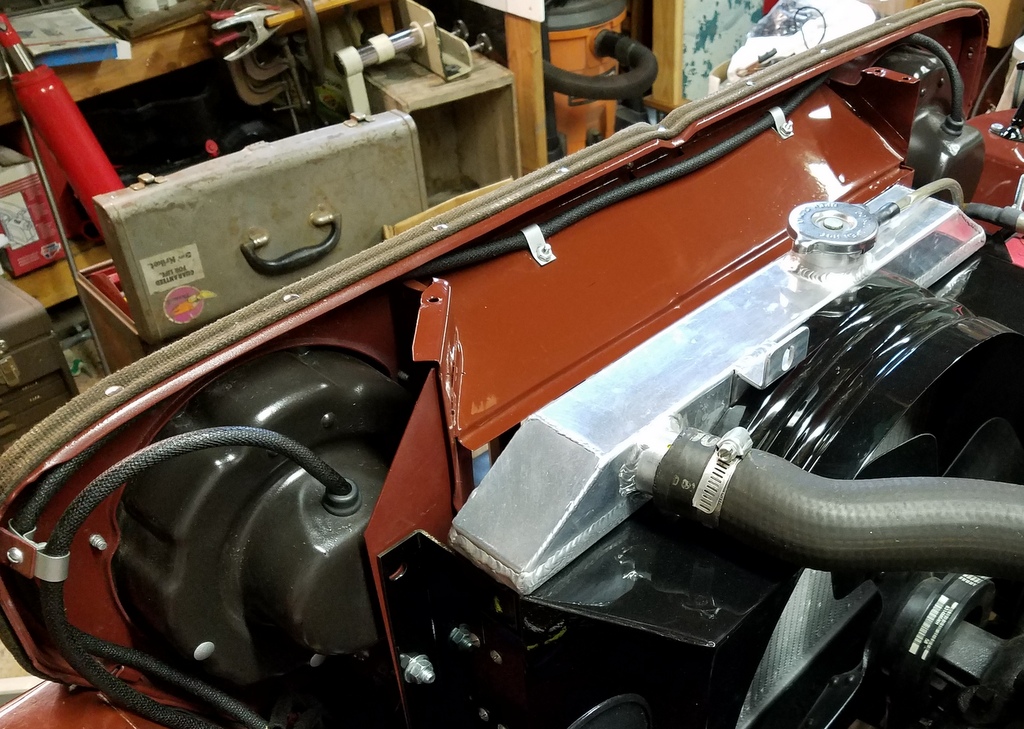
The thin rubber sheeting was also used to insulate the front fenders where they bolt onto the tub and grille. Double stick tape held it in place before installation.
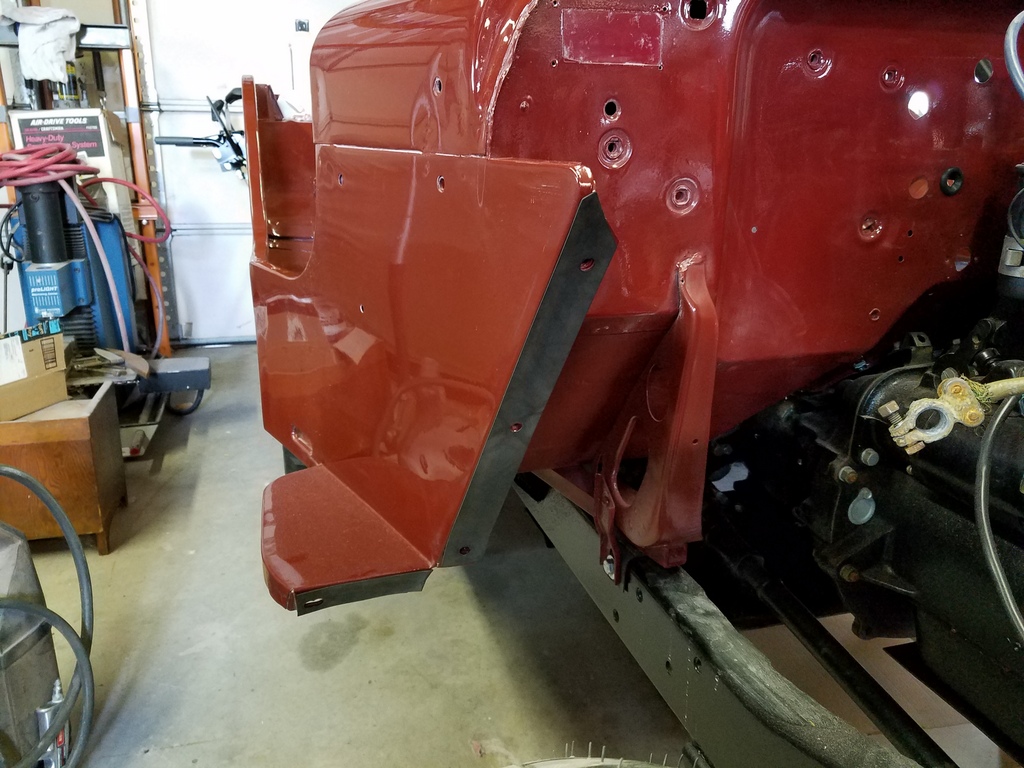
Fenders and grille installed.
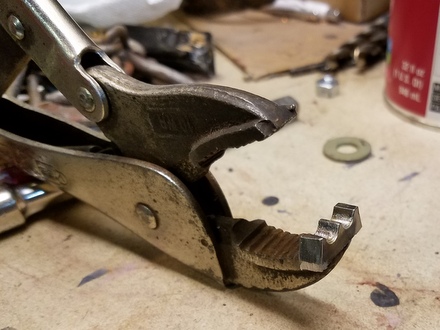
I obtained proper grille/hood welting from Walcks (my favorite Willys Jeep supplier) to line the top flange of the grille. It is held on with split rivets.
I used an Xacto blade to pierce a hole into the welting, inserted a split rivet, then used customized pliers to curl the legs of the rivet back. The custom pliers is comprised of a piece of steel with two "U" channels welded to a pair of vise grips. Squeezing the vise grips closed forces the rivet legs to spread out and curl around to clamp the underside of the grille flange.
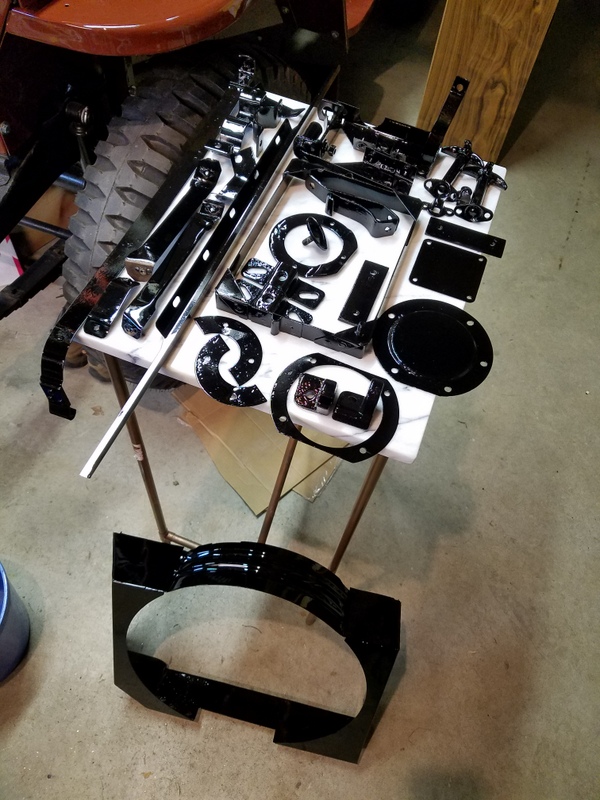
Detail Painting
As you may have seen in the previous pages, there were scads of little doo-dads that needed attention. These all were strung up with wire onto long 2x4's and painted.
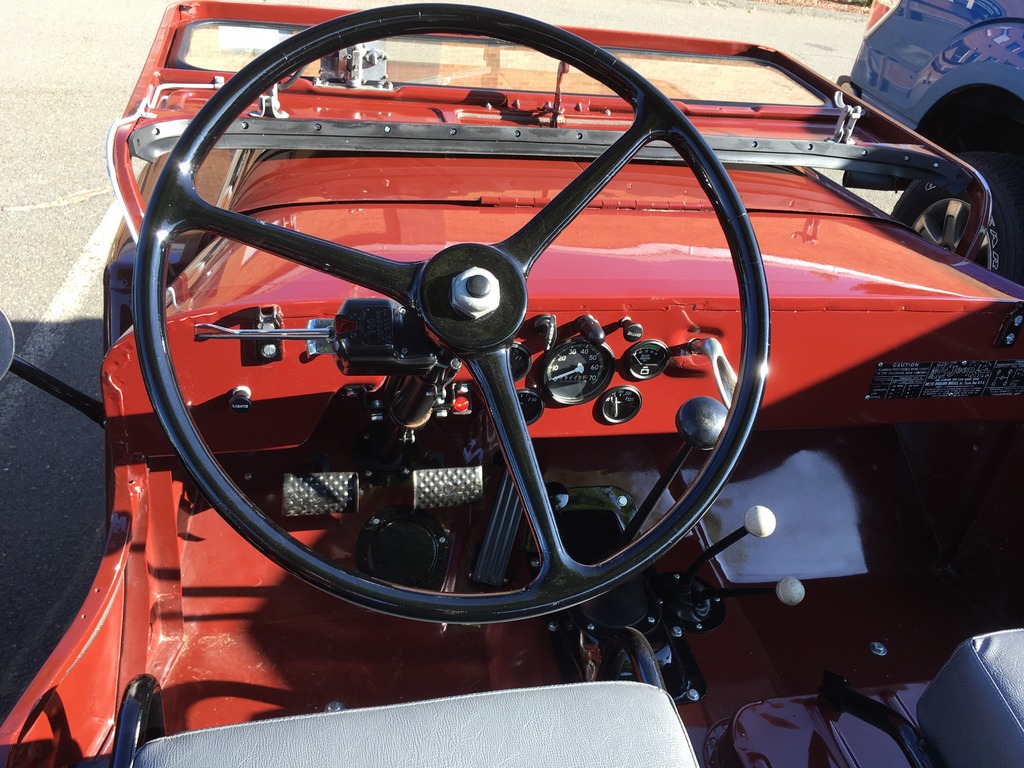
Here is the steering wheel receiving some JB weld crack filling before paint:
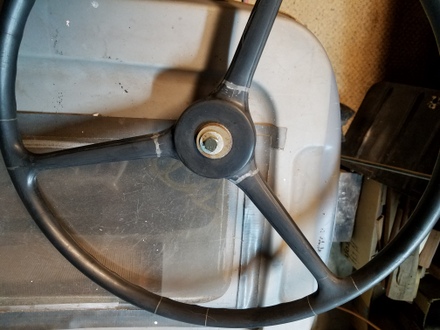
It was sanded, smoothed, epoxied, primed and then topcoated. The Napa paint seems tough and I expect it to last a long while.
The Jeep's air cleaner was missing, so I shelled out some bucks for a replacement. This one has a date code of 1952. It was filthy but had no rust. I stripped it of grease and paint:
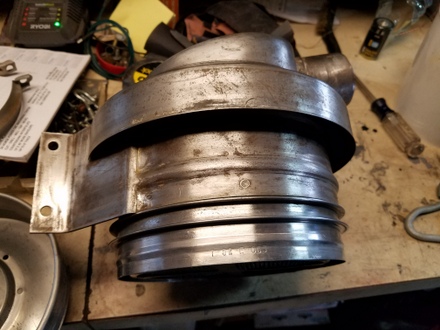
Then it was subjected to some bodywork...
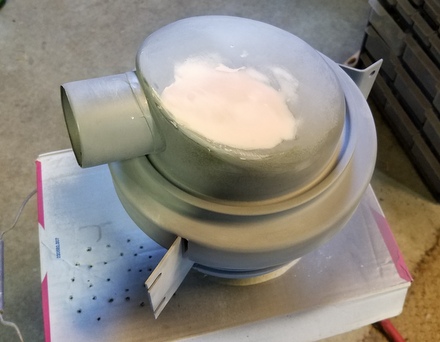
The final paint looks good. It flows out really nicely. The repro decal will add a tiny bit of color under the hood. The threaded eye screw was blasted and zinc plated.

Seats
The seat frames required repair of some cracks and broken welds.
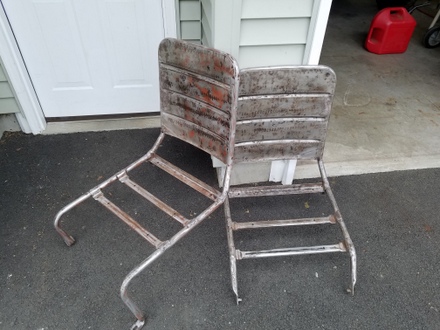
The frames were epoxy primed, 2K primed, sanded, then underwent some glaze work to fill the pits.

Seat upholstery
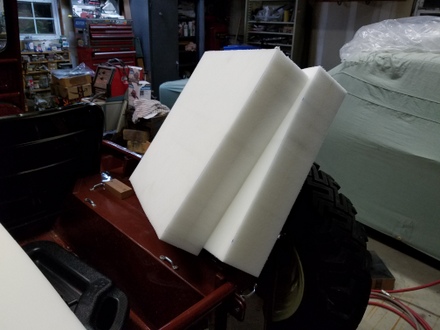
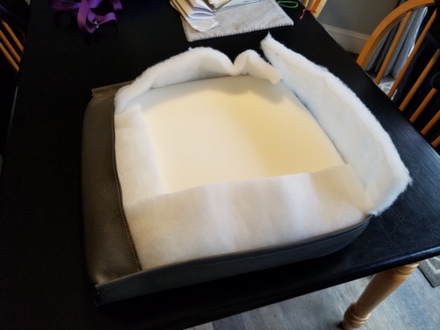
This Jeep still had remnants of it's original seat covers which were a medium gray, so I got the same color reproduction seat covers from Walcks. It turns out one of my bottom seat springs was not original, so I decided rather than search for a replacement spring seat (no repro's available), I'd switch to foam. I purchased 36lb foam that turned out to be unacceptably soft, then another batch of 44lb stuff in 2" thick sheets which is still rather soft but it'll do for now. I bonded two layers of foam together with 3M 77 adhesive then cut out the final shape with a band saw.
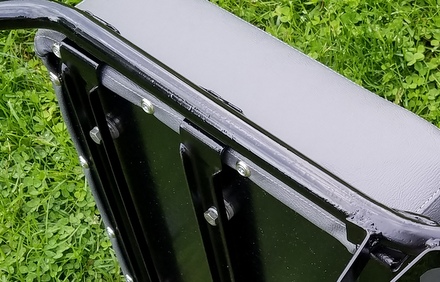
Each foam cushion was wrapped in 3/4" "fiberfill" poly material which compresses easy and makes the seat covers look appropriately stuffed. The spring seat bottoms had metal pans, so I needed to make pans for the foam bottoms. Using my one good metal seat pan as a model, I fabricated a pair of new pans with 1/2 inch plywood. "T" nuts were installed into each pan so they could be screwed down to the seat frames with bolts from the underside. The bottom seat covers are supposed to wrap over the foam, over the edges of the pans, and the edges be captured by metal tabs. With the new wood pans, I used screws with finishing washers to secure the edges of the covers to the underside. These screws will not be visible when the seats are installed. In the image below, note the bolts (two visible in picture) going through the frame and into the "T" nuts in the pan. The pan required spacers so I used a stack of a few washers for each bolt. Also note the screws/finishing washers passing through the cover edges into the bottom side of the pan (seven visible).
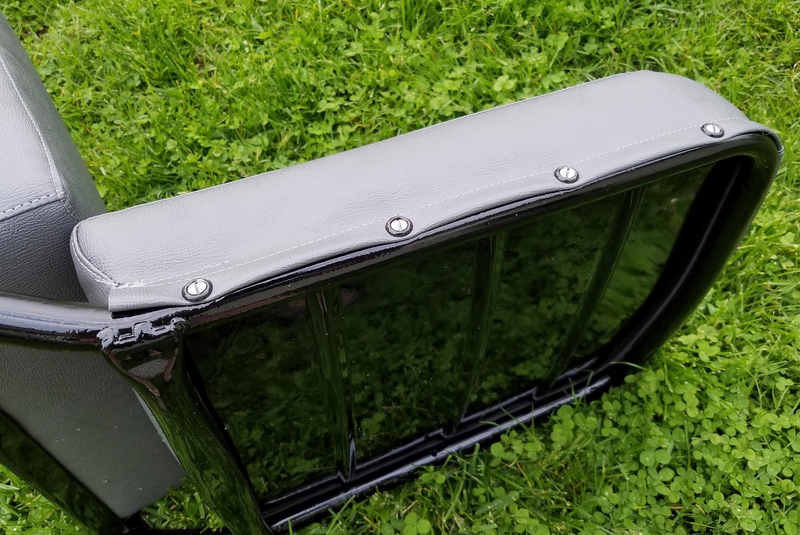
I decided to go with foam for the backs too. A single 2" thickness works fine, and the only foam shaping necessary was to round the tops of the backs with a razor. Here are the backsides of the foams stuffed into the back covers with a layer of fiberfill.
The excess fiberfill gets folded down, and the seat back covers get fastened down to the seat frame backs with oval head screws with finishing washers. I actually sandblasted and zinc plated the original slotted oval head sheet metal screws....I couldn't find replacements. The finishing washers were available at Home Depot.
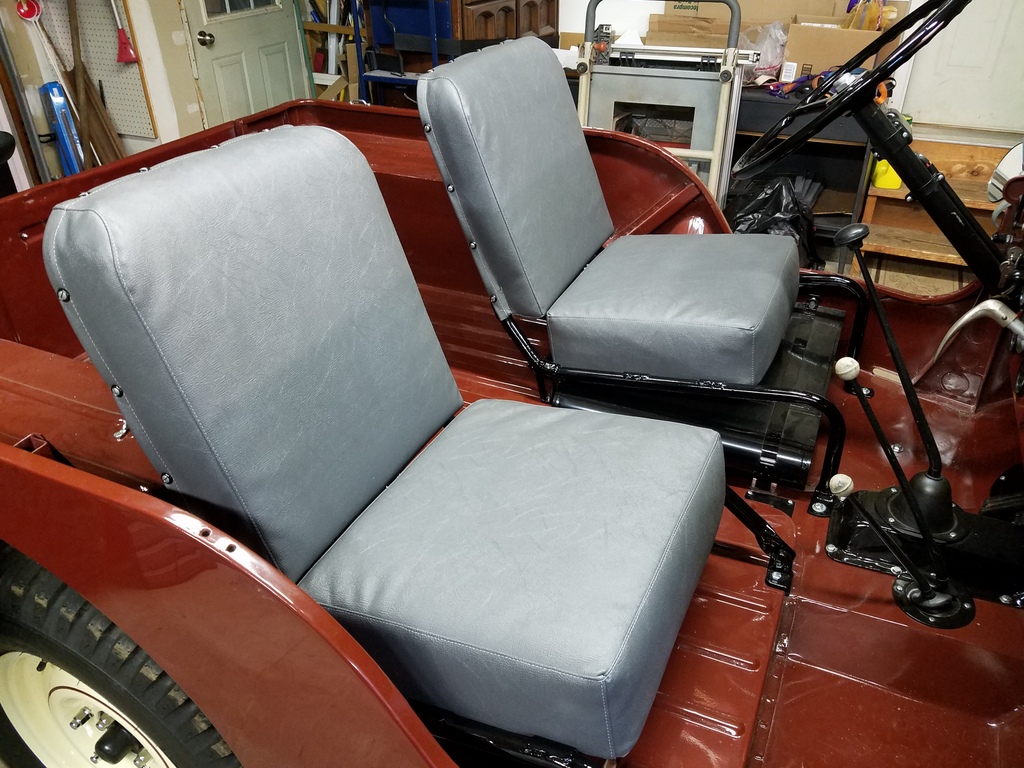
Seats installed:
Fasteners
All of the original hardware on the Jeep was rusty to some extent. I believe most hardware was originally bright zinc plated which isn't the most robust plating. Restoring a shiny finish to original stuff wasn't worth it to me, so I used new hardware in many locations if I could find equivalent stuff. Regular hex head coarse thread bolts were easy to find locally, but I had to source fine pitch hex head bolts and slotted sheet metal screws from McMaster Carr (online). I paid attention to subtle stuff like keeping slotted fasteners to retain the original look throughout the Jeep.
For the unique, Jeep only hardware, I experimented with DIY zinc plating. There are quite a few tutorials for this process online. The plating process yields a pretty dull finish, but buffing (actually brushing with a brass brush) shines it up a bit and it looks great compared to paints.
Here's a batch of hardware fresh out of my plating "bath" before buffing:
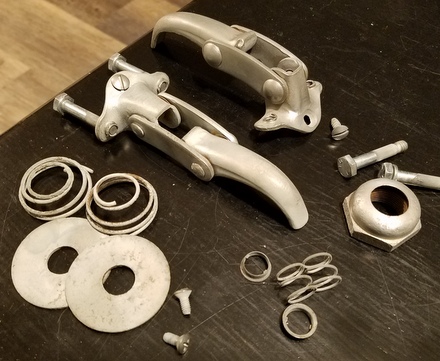
All fasteners, whether new or re-plated were coated with clear coat "paint". I think it will add life to the zinc plating and keep it looking like new longer. Here's a shot of the conspicuous, utilitarian fasteners sticking out all over the front fender area.
Wiring
The original electrical system was completely deteriorated into uselessness, so I made up a completely scratch built 12 volt system with upgrades including turn signals, relays and fuses. I made every effort to keep the modern stuff as unobtrusive as possible including re-building the original switches and controls.
Non-adhesive harness tape (the stuff that doesn't melt and get gooey) was wrapped around all the bundles of wires to keep the modern stuff hidden. Despite the addition of extra wires, (passenger side tail light, turn signals front and back,) I did my best to route the wiring as close to original locations as possible. Turn signal wires required a bigger terminal strip on the inside driver fender but at least it's in the same location.
A kit furnished the correct grommets for the firewall holes. The wire bunches coming through the driver side feedthrough shown below are for all lighting front and back, brake lamps, horn, and hi/lo beam switch.
I fabricated an electrical panel (to be detailed in the Willys Jeep Electrical Page) and mounted it up under the dash with some steel brackets I fashioned.

Here's the panel mounted up behind the dash. It's hidden but still accessible for maintenance. Relays for headlights, horn, and accessory circuits (turn signals, eventual heater blower motor, etc) are in the top row, along with the flasher can and a tiny voltage regulator (see Willys Electrical System page. [coming soon]

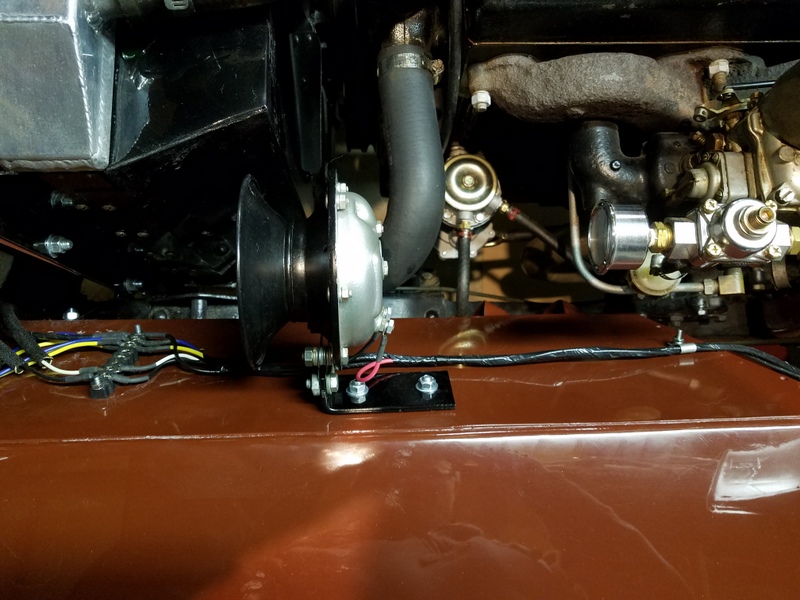
Ignition
I installed a non-resistor type 12 volt ignition coil along with an external 1.6 ohm ballast resistor mounted right beside it. The ballast resistor lowers voltage to the coil/points, which gives them longer life. During cold starts however, the ballast resistor can be bypassed to allow full voltage to the coil. This is accomplished by using a Ford style starter relay with an "I" terminal. When the starter relay is engaged to power the starter, the "I" terminal is simultaneously switched on and sends voltage directly to the "+" terminal of the coil for a "hotter" spark. Once started, the relay, starter, and "I" terminal go back to zero volts and the coil gets it's power through the ballast resistor for normal running.
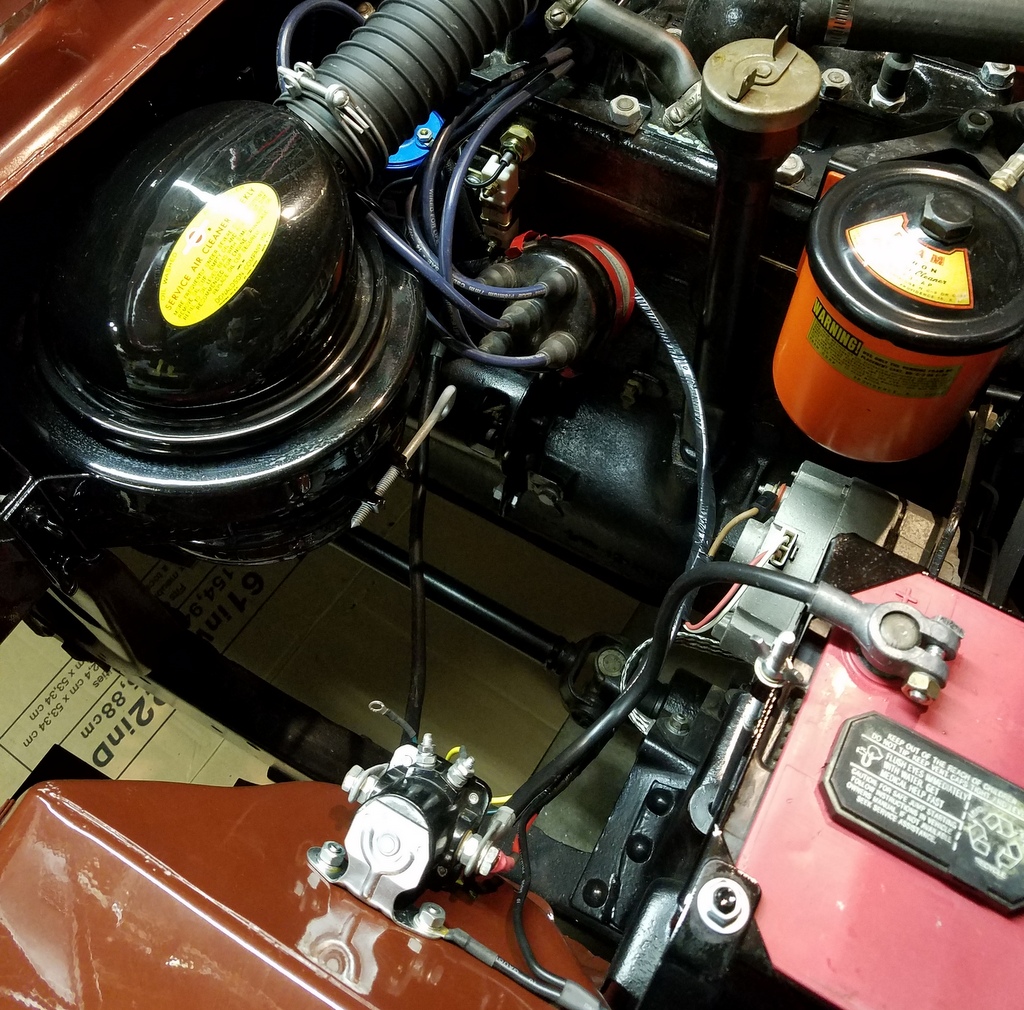
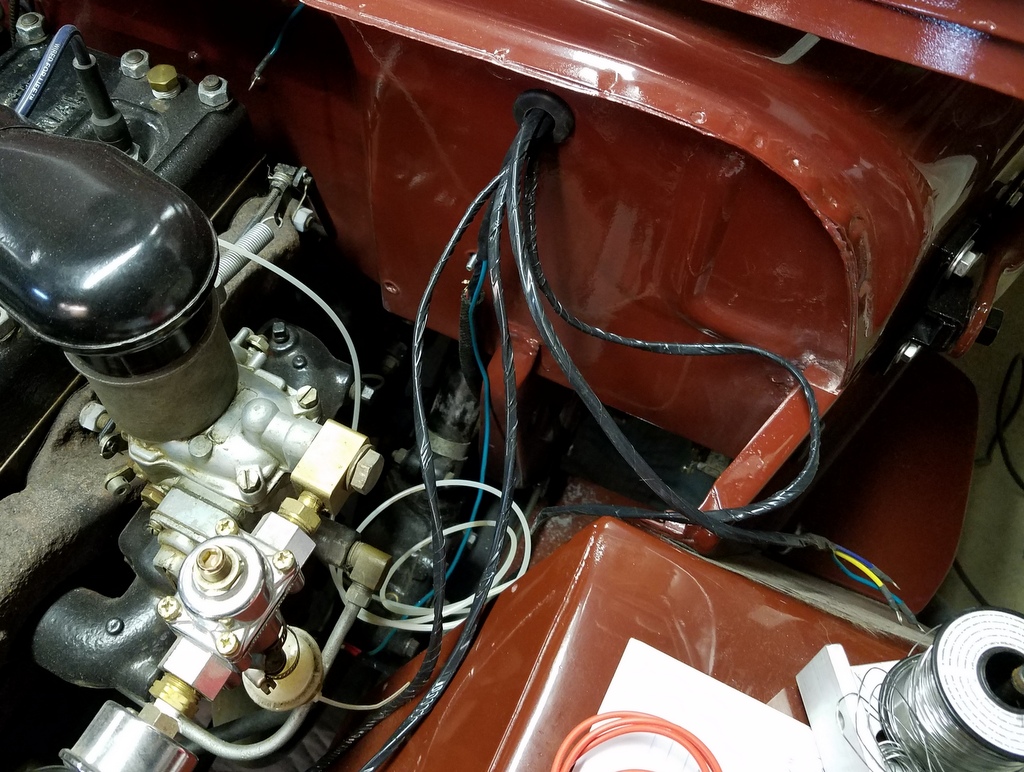
The harness for ignition, alternator field, and starter wires pass through the center of the firewall, run along the engine over the distributor, then pass behind the alternator and to the passenger fender. It too is wrapped with black harness tape. In the lower center you can see two ground wires...one is just to ground the relay, and the other goes all the way along the harness into the passenger compartment and grounds the dash. I used original "P" clamps to hold the harnesses down on the fenders and grille. Willys used asphalt coated looms for wires in the grille going to the headlights and lamps. The loom is also used for the wires running along the frame to the back. It can still be found at NAPA.
Gauges
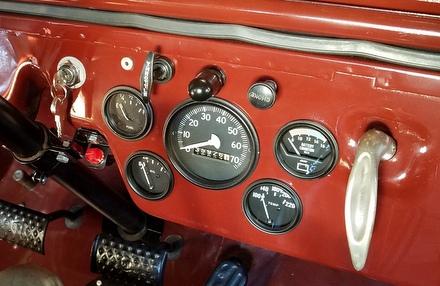
The only original gauges left in this old Jeep were the speedometer, fuel and oil pressure gauges. Much of the face paint in the oil pressure gauge flaked off, so I purchased a new one. But while the speedometer looked rough, the face inside looked okay under the dirt. A quick test indicated it might still work so I decided to take the speedo apart to see if it could be cleaned.
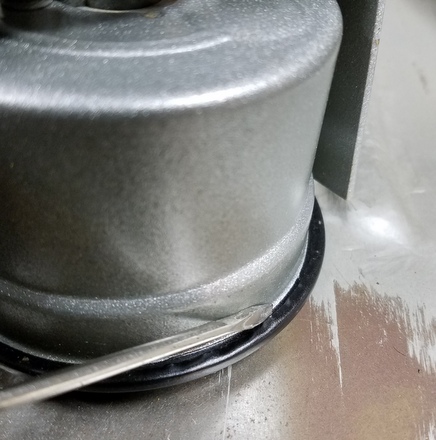
In order to take the gauges completely apart, you must un-swage the bezel. This can be done with patient peeling back of the underside of the bezel using a small screwdriver. Peeling with "small bites" a little at a time, circling around the bezel a few times bends the lip back without stretching the metal out and allows it to be reinstalled after you're done.
Luckily the gauge was beautiful inside with no rust or corrosion.
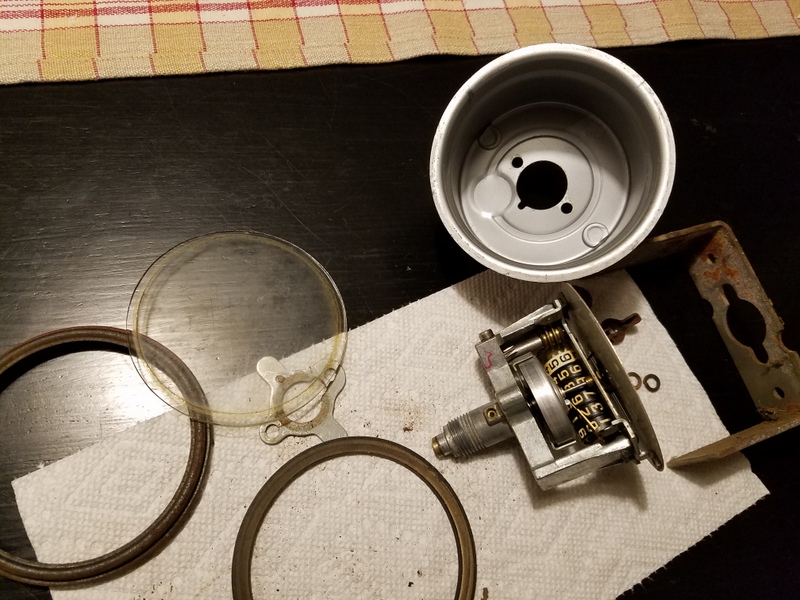
I flushed the main bushing as best I could with alcohol and then lubricated it with sewing machine oil. I left the odometer reading alone. The glass was scrubbed and polished with buffing compound, the bezel was sandblasted and painted, and finally it was reassembled. The bezel was folded back down in "small bites" until it was tight.
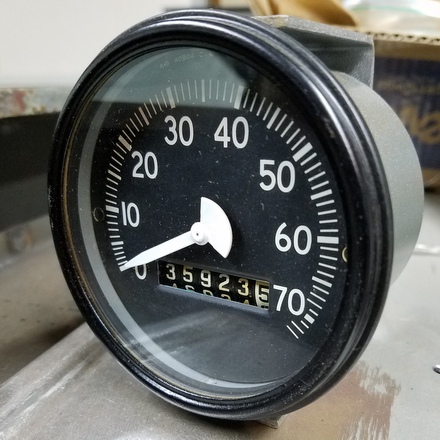
A drill hooked up to the cleaned and oiled speedometer cable confirmed the speedo worked nice and smooth.
The fuel gauge face was a little flaky, but I thought it worth re-using.

It too was taken apart to clean the glass inside and blast and paint the bezel. I tested it with a new 6 volt sender with a 5 volt power supply and the guage worked fine.
To make it work with the Jeep's new 12 volt system, I purchased a 7805 voltage regulator integrated circuit ("IC"), wired it into a tiny circuit, and stuck it onto my fuse panel to supply suitable voltage to the gauge. See the Willys Jeep Electrical System page to see details.
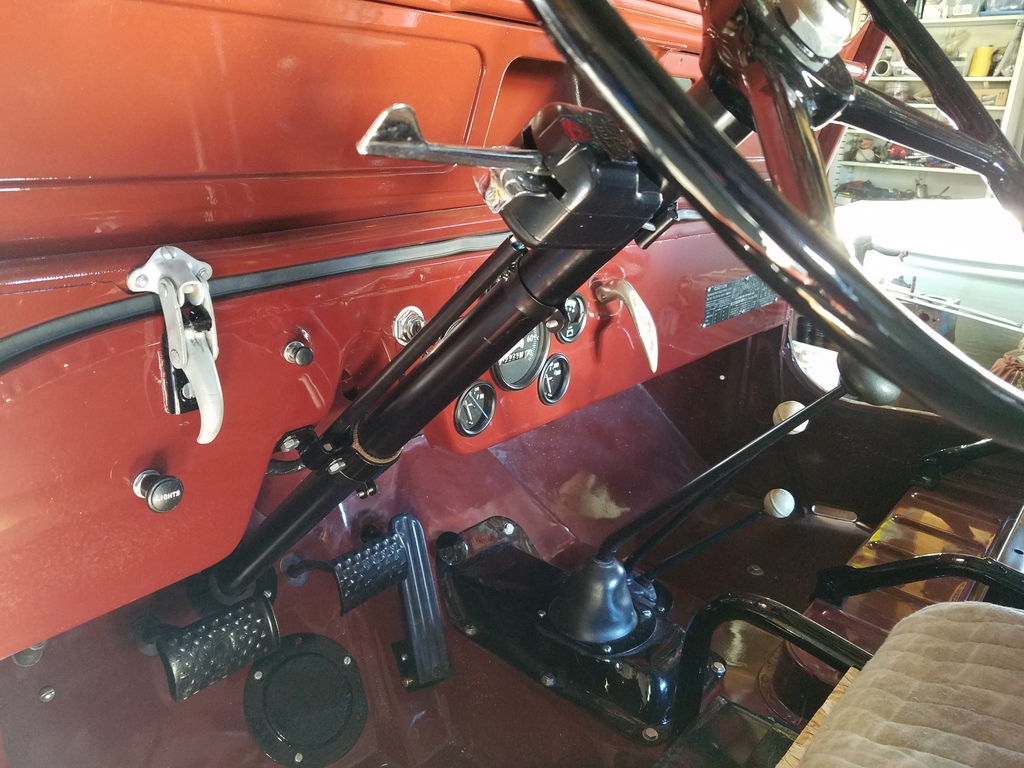
Switches and Cables
The Jeep has only two switches: the high/low beam switch and light switch. Both were sticky so I took them apart to clean the old grease out. The cases have tabs which can be peeled back for disassembly. The LIGHTS knob embossing was worn, so I milled a new "LIGHTS" into the knob and filled it with white paint.
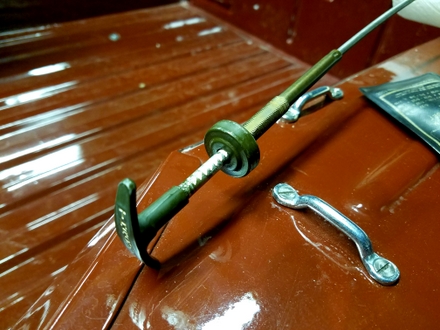
My hand throttle cable was rusted shut so I purchased a military surplus "T" handle style unit from eBay. I deviated from stock here because this looks cool and features a ratchet locking feature. A quarter turn of the handle releases the ratchet. The housing is a direct fit in the dash too. I've found the hand throttle to be great for keeping the engine running at 1100 RPM or so for the first 5 minutes after a cold start.
Tail Lights
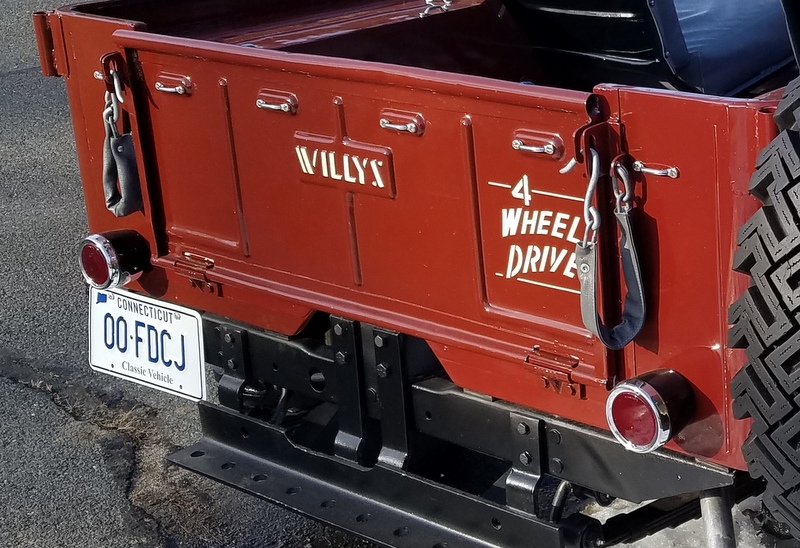
This Jeep was born with a single tail light only. I thought dual tail lights to accomodate turn signals would be an acceptable modification. During one of my craigslist searches I found a seller with a bunch of parts I needed including two nice reproduction NACO type tail lights and a SignalStat 900 turn signal rig.
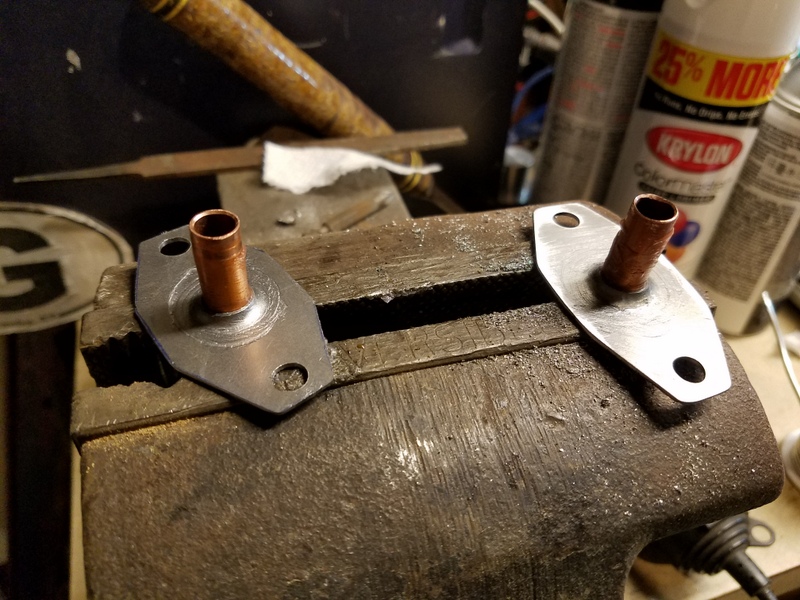
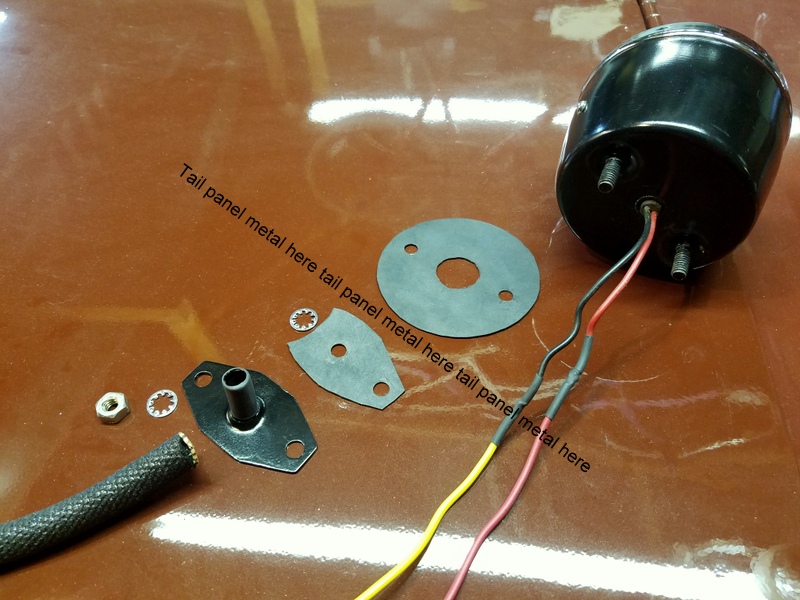
The lamps were in good shape only needing a repainting inside and out. The lamps have a measly grommet which gets exposed to water and dirt kicked up by the rear tires. Wanting a more waterproof soution, I made up flanges with a short tube to which I can affix some asphalt loom. The flanges are steel with holes cut into them. A tapered punch put a fillet on the center hole into which I put short pieces of copper tubing. The tubing was soldered to the steel.
For sealing to the body and lamp housing, I cut rubber gaskets for the lamp side as well as the flange side. The picture below shows the sequence of how it goes together. I also used star washers on one of the mounting studs for electrical ground. I scratched off a little paint on the tub where the star washers go and greased the metal up for protection. I want reliable grounds!
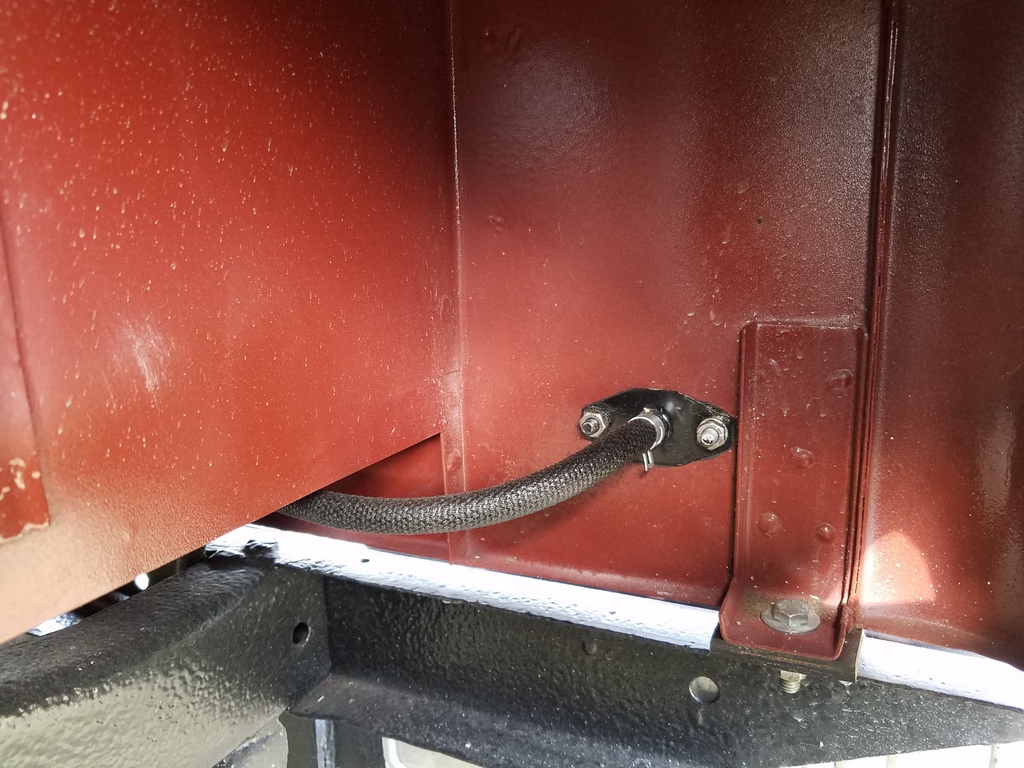
Here is a view of the flange from inside the wheel well. Note the spring clamp that holds the loom onto the tube of the flange. The loom runs to the relative shelter of the inside rail of the frame.
I had painted the lamp housings with Krylon, but they didn't look good enough so I sanded that off and repainted with the Napa Martin Seynour. The gloss is way better than spray bombs.
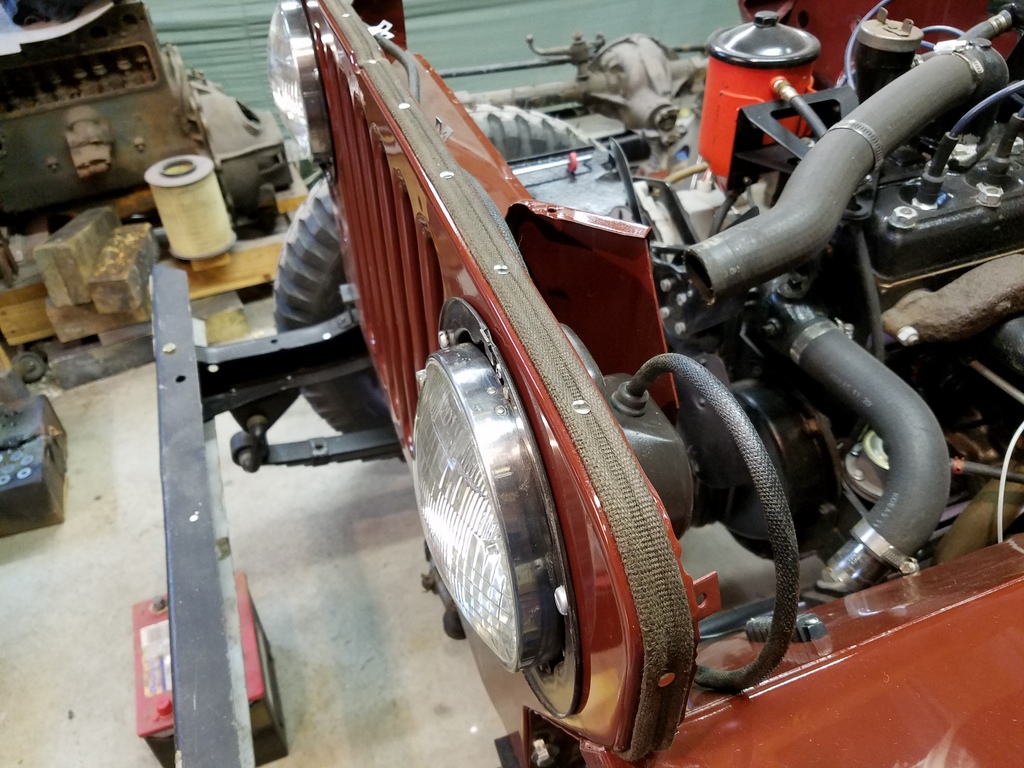
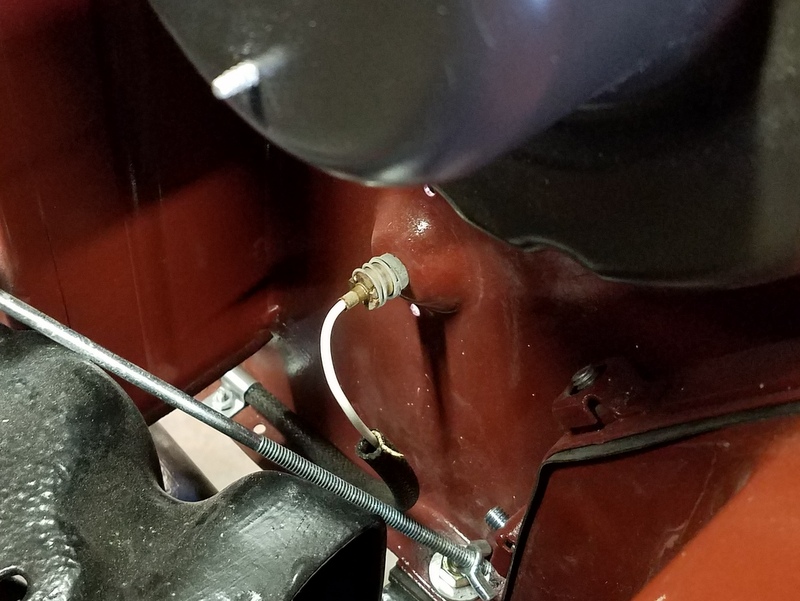
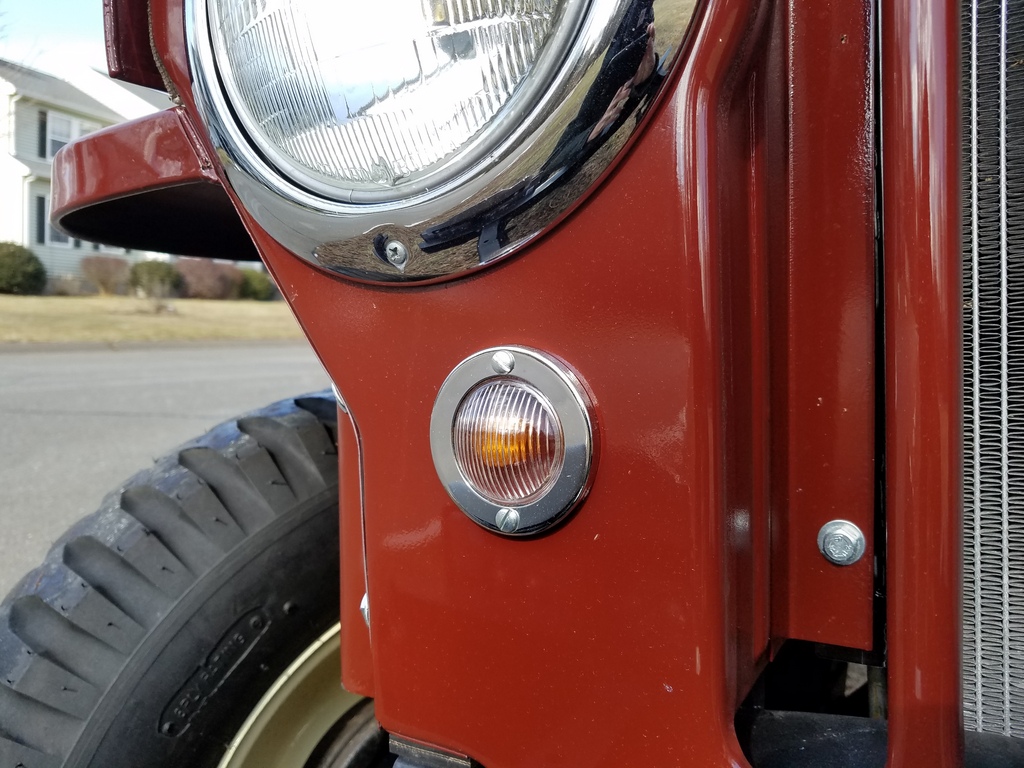
Front Parking Lamps
The front parking lamp housings are a very clever design. They are installed from the back and retained with bayonet style tabs in the grille openings. I restored the sockets by taking them apart and replating them. I cut the old wire off and drilled out the button terminals and soldered in new wire pigtails.
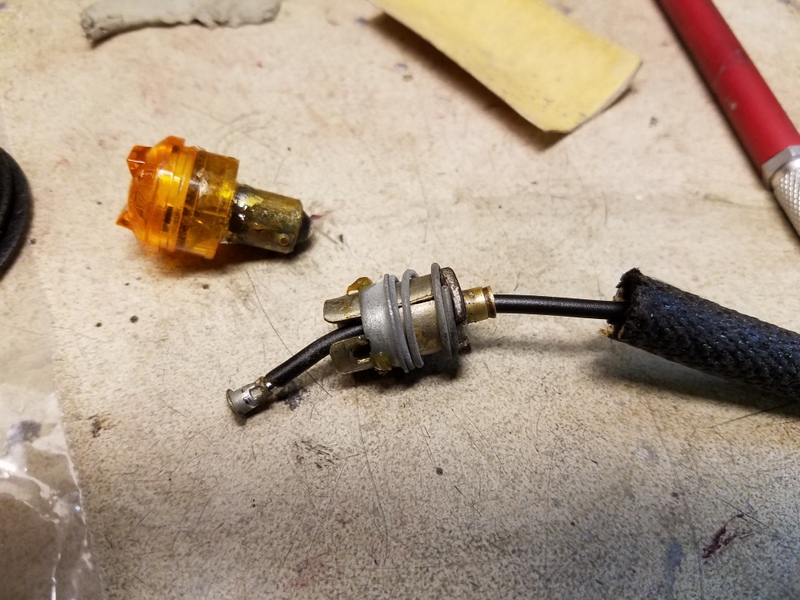
I could use standard bulbs (there are equivalent 12 version bulbs for that socket) but I wanted to go with amber color since I was installing turn signals. I thought I'd look for LED bulbs. But I was surpised to find that they are expensive, and reviews indicate they're not reliable. Instead, I bought some very inexpensive Blazer brand "penny light" pigtailed LED lights (which are well built and reliable) and cut the leads off. I dug out their potting stuff and soldered the remaining pigtail stubs to scavenged "Ba9s" bulb bases (I popped out the old glass globes and desoldered the wire at the ends). I epoxied the new assembly together for additional strength. It was a little side project. When installed the custom bulbs fit under the bezel/lens covers.
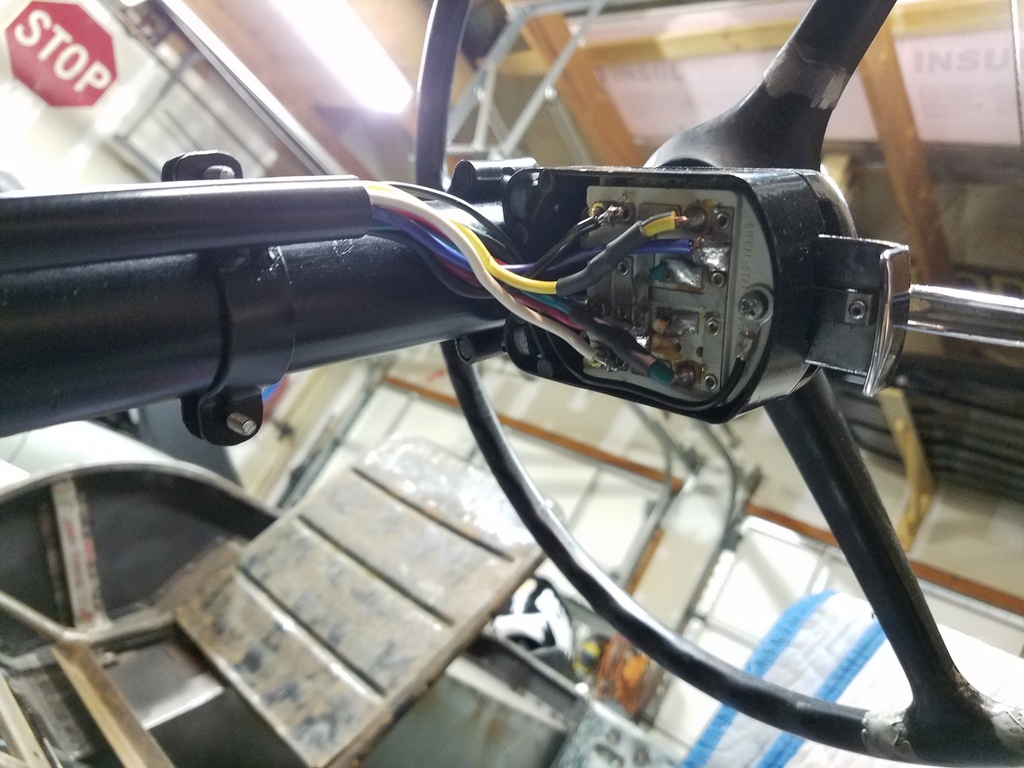
Signal Stat 900
I purchased a used 900 series Signal Stat turn signal mechanism before I knew much about them. It turns out the 900 series Signal Stats can't alternate inputs between front parking light power and turn signaling power on the same filament. One solution is to add dual filament bulb housings to the grille that likely involves drilling out the original mounting hole to fit a larger lamp housing. I didn't want to do this so I instead took the Signal Stat apart and modified it. (I intend to make a page about it so stay tuned), but basically after modification the front parking lamps can function normally as "parking lamps", but when I signal, the appropriate grille parking lamp blinks. All on the same single filament bulb.
When the unit is mounted on the column, many wires must go to and from the unit which got a little messy. I wanted to hide them so I made up a steel tube to run from the dash up to the unit. I welded tabs to the tube to bolt it to the column. It neatens things up. Well, I like it anyway.
Coming Together
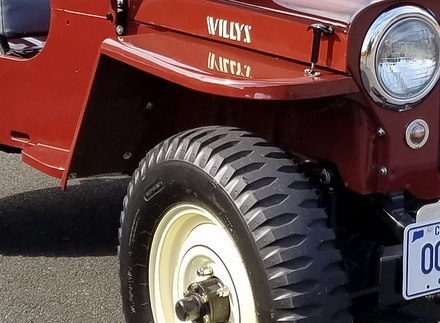
By spring of 2019, the little Jeep was starting to come together.
I saved one of the town and country tires it came with and mounted it to my spare wheel with some prybars. I even reused the tube....so far it's still holding air!
I took my first runs to shake out bugs. Besides some small gremlins, the machine was working very well. I started to take longer and longer test runs.
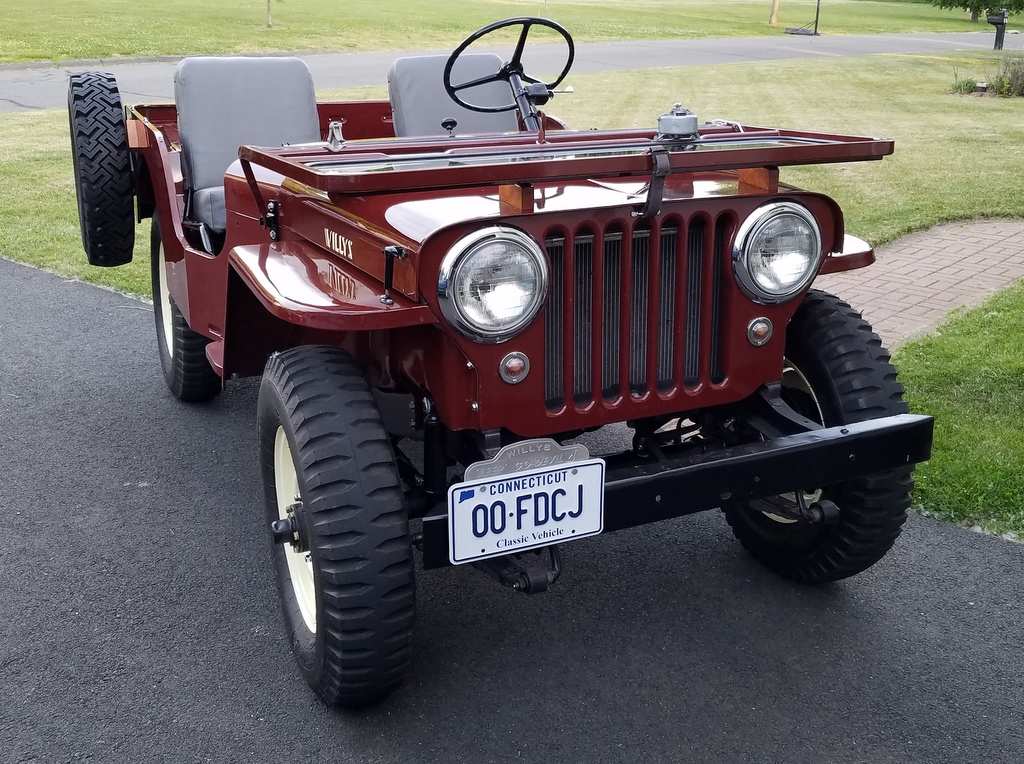
Still not finished yet though....
Check out Part 2 of the Willys assembly!
Or, click here to get back to HOME page
If you have any comments or questions, drop me an email:
SFS
Links:
Willys Jeep CJ3A Forum
There exists a nice set of webpages for CJ3A's. It's got a forum too that caters to both '3A's and CJ3B's. It's a great resource, and frequented by very knowledgible folks.
1967 GTO Original Owner
These two videos feature an original owner GTO. This car was featured in Hemmings Muscle Cars magazine a couple years ago. Part 2 has inside and outside shots of the owner driving the car. Very nicely done.
Blues Maker
"Mississippi" Fred McDowell. One of the great Bluesman. This is a documentary made in 1969.
Pinstripes
Pinstriping the ol' fashioned way. Pretty nice.
MGB Racecar
I've always liked MG's. Watch this MGB lift it's inside tire a few inches off the tarmac when going "'round the bend". Awesome.
Pepsi Throwback
Pepsi has put out a "limited edition Throwback" version of Pepsi with REAL sugar, instead of high fructose corn syrup which has been used since the 80's. Holy cow there IS a difference; it's WAY better. Find some quick!