
Projects:
GTO
My
67 Pontiac GTO
Trunk Body Work
-Trunk pans
-Wheel wells
Body Work Part 1
-Rear Quarters
-Rear Door Jambs
-Window Reveals
Body Work Part 2
-Cowl
-Pillar
-Rocker
Body Work Part 3
-Windshield channel
-Doors
-Fenders
GTO Paint
-Filler work
-Priming
-Blocking
GTO Frame Work
GTO Convertible Top Pt 1
-Top Frame
GTO Convertible Top Pt 2
-Top Trim
GTO Drivetrain
-Engine
-Quadrajet Rebuild
-Exhaust
-Axle
Muncie
Rebuild
popular
Auto to Manual Swap
1967
Ram Air GTO
story
Wheelhouse Filler template PDF
Willys CJ3A
CJ3A Intro
Engine and REBUILD
Drivetrain
BodyWork 1
BodyWork 2
BodyWork 3
BodyWork 4
Paintwork 1
Paintwork 2
Final Assembly
Final Assembly 2
Electrical System
Other Rods
TJ Wrangler Rubicon
CJ7
CJ8
Decrepid Dakota
Powerdyne Minibike
Allis Chalmers B engine rebuild Part 1
Allis Chalmers B engine rebuild Part 2
Allis Chalmers Generator to Alternator conversion
Gizmos
Stereo camera
rig
Stereo mic preamp
About:

Feeds

Markup
2003 Jeep Rubicon Suspension Rust Repair
This page describes a pretty substantial repair to an aging TJ Jeep. The main takeaway is to show folks that sometimes it's worth it to take a deep dive and fix something...and they can do it themselves...check it out:
January 2024
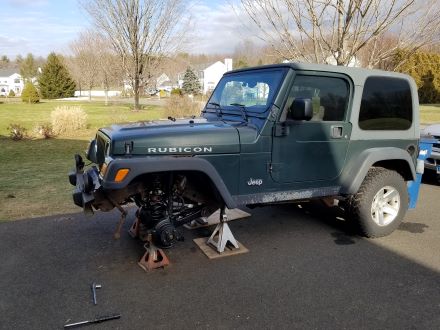
In January 2003, I had the opportunity to purchase a new Wrangler Rubicon. I was happy to find one because Jeep said they'd limit production to 8000 (they blew past that!). It served as a daily driver for many years, through New England summers and winters. In the early years, a few times a season I would wash off winter road salt from the undercarriage, but as the years went by it became apparent that rust was creeping in.
It turns out TJ Jeeps are infamous for rust, particularly horrible frame rot. I believe the washings I did helped ward off deep frame rust, but in 2020 a meticulous survey revealed that the front axle bracketry had some holes showing through the the passenger side spring pocket. The front upper control arm mount was paper thin in some spots too. I thought about it for a while and decided to fix it rather than junk it.
The Fix
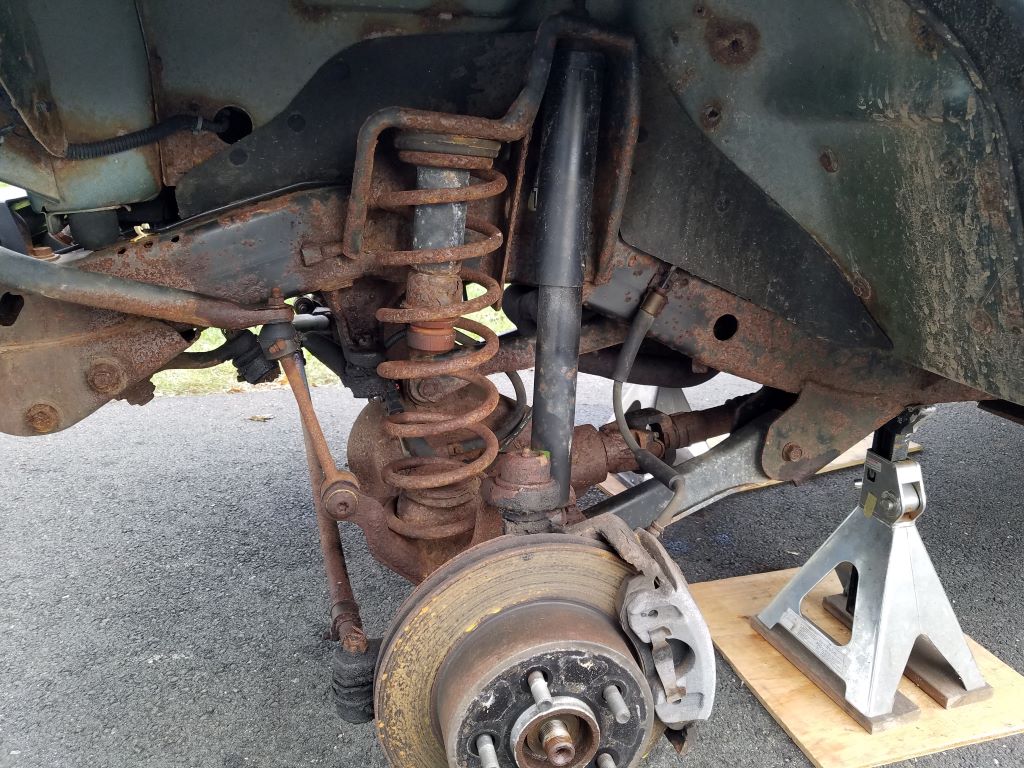
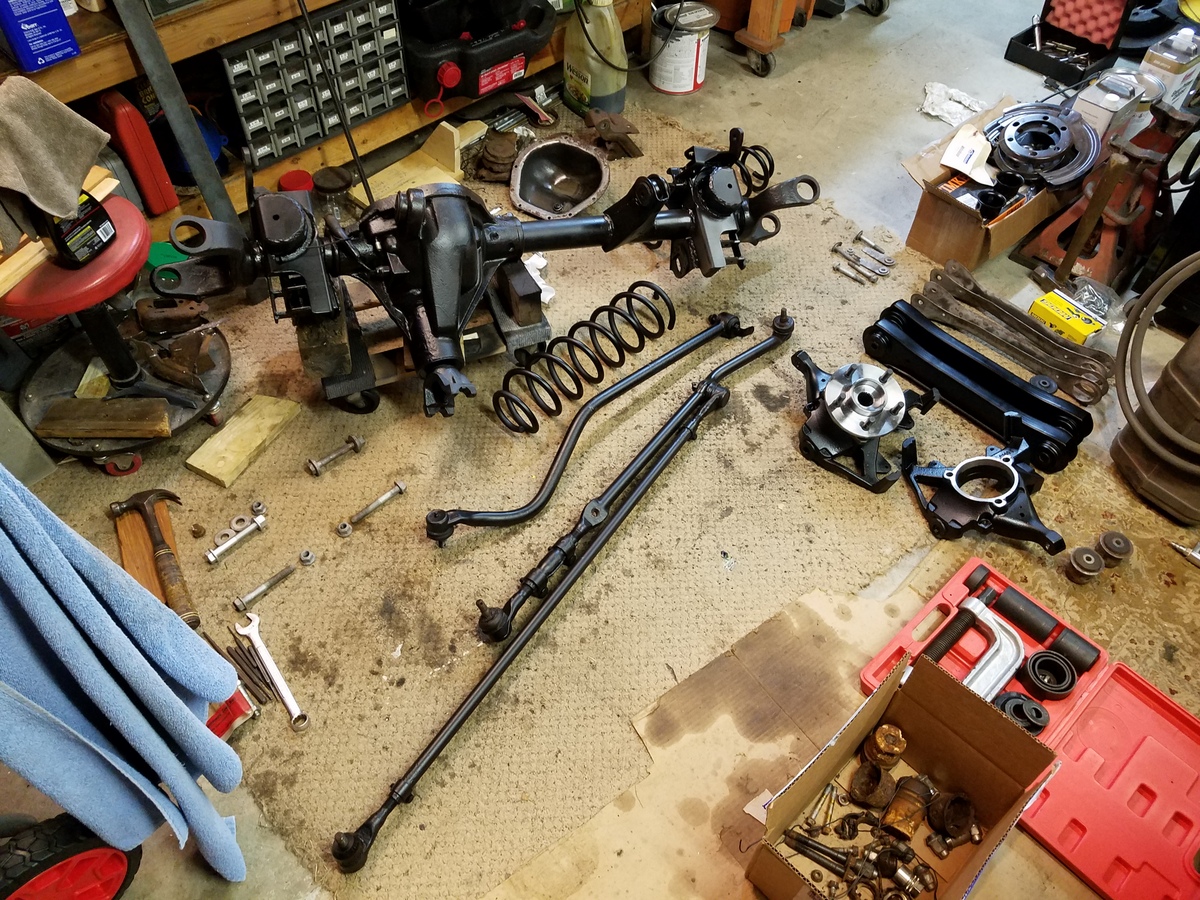
To replace the brackets, they must be cut and ground off the axle housing, which means the whole front suspension and drive axle must be removed from the Jeep. Bracket rot must also be a common problem for TJ's as it turns out Dorman makes replacement weld-in brackets. However, during the COVID wave, the passenger side bracket was out of stock nationwide. Rather than wait for Dorman (who knows how long), I purchased a more "aftermarkety" version of this bracket kit from Barnes 4WD.
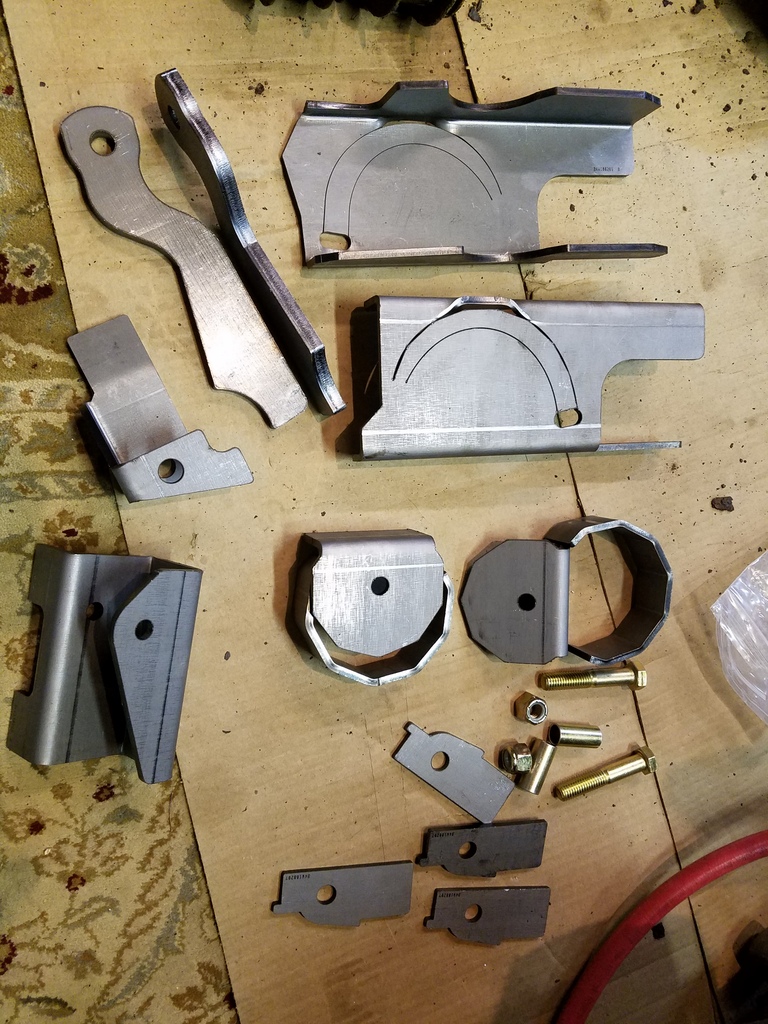
The Barnes kit is beautifully made (laser cut I believe), heavier duty than the Dorman stuff, and the fit tolerances are perfect. Their kit does entail more work however; you must weld the multi-part brackets together yourself before welding them onto the axle.
Disassembly (more like demolition) was carried out with a newly purchased 1050 ft/lb electric impact gun. If the bolt heads resembled their original form it was no problem. But some hardware was rusted very heavily and required pounding smaller size sockets onto the lumpy remains. Some were so bad I had to slit them and power chisel them off. One control arm bolt had to be extracted by means of a sawzall.
Once the Dana 44 was taken out, I got a much better view of how bad the knuckles were. The three bolts for the wheel bearing assembly were unrecognizable. The whole thing was swollen with rust swelling out in all dimensions. I cut the bolts for the bearings and chiseled them off.
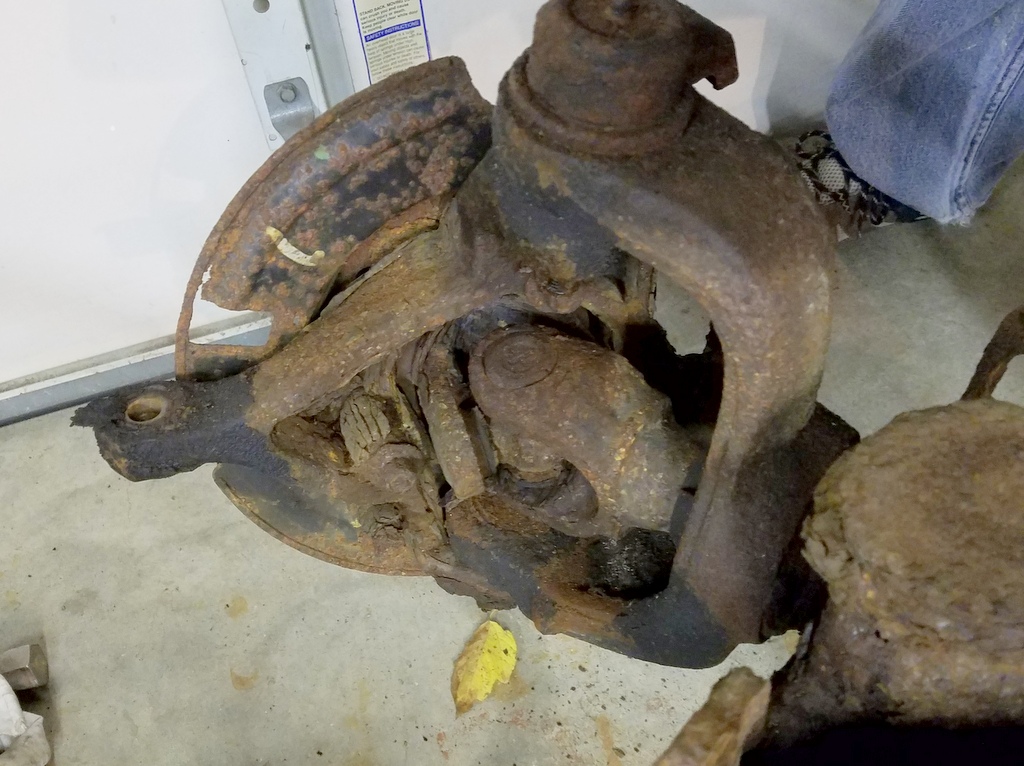
A balljoint press along with the impact gun easily popped the ball joints out. I was able to do the job without buying a "JEEP/Dodge ball joint adapter kit" that alot of places sell. Maybe next time.
Clean Up and Fabrication
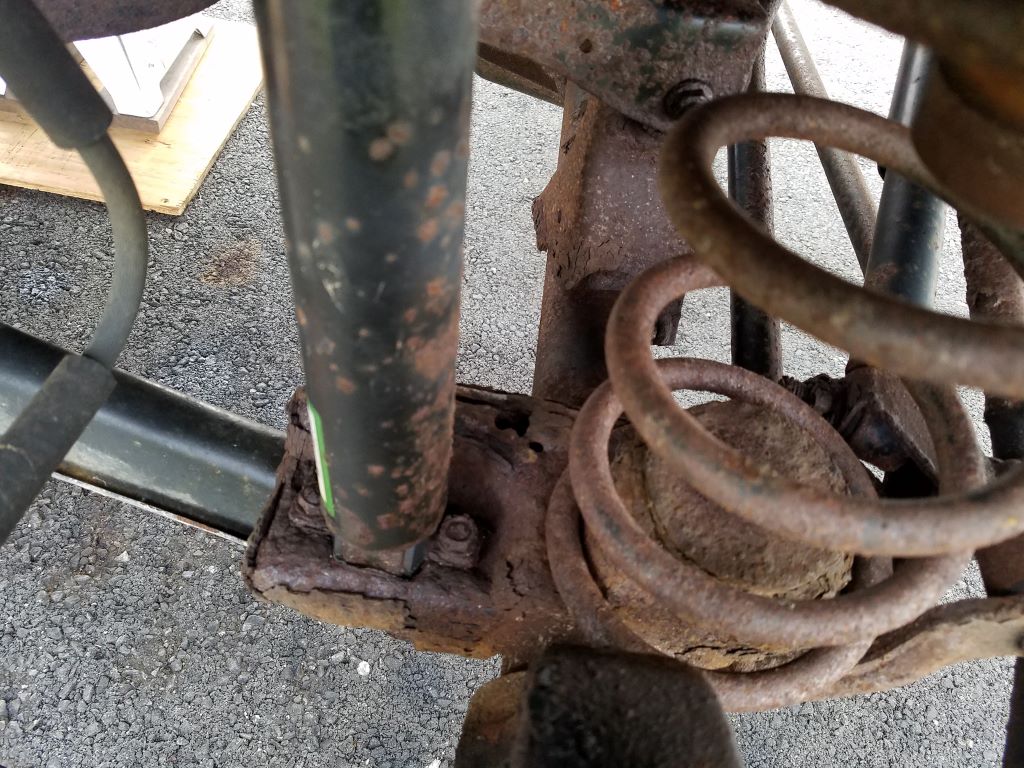
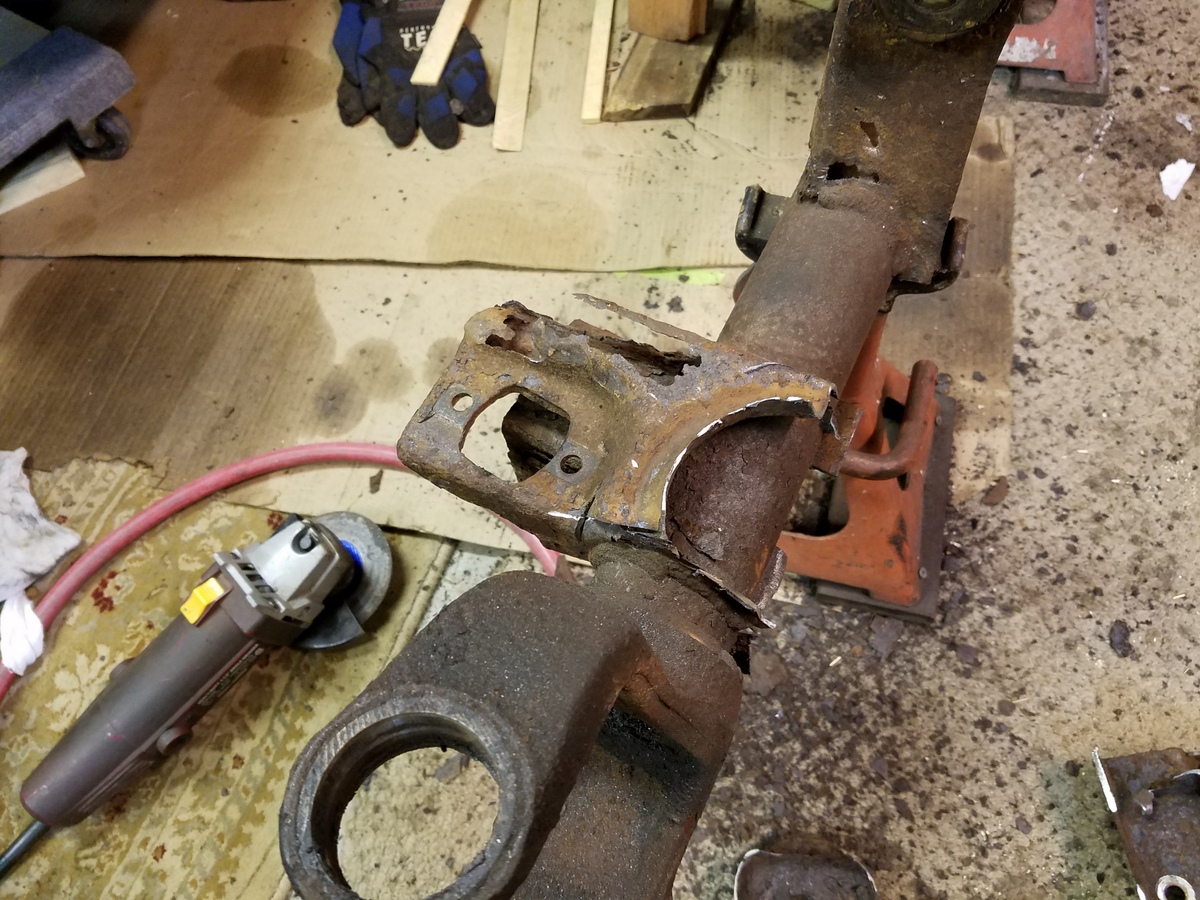
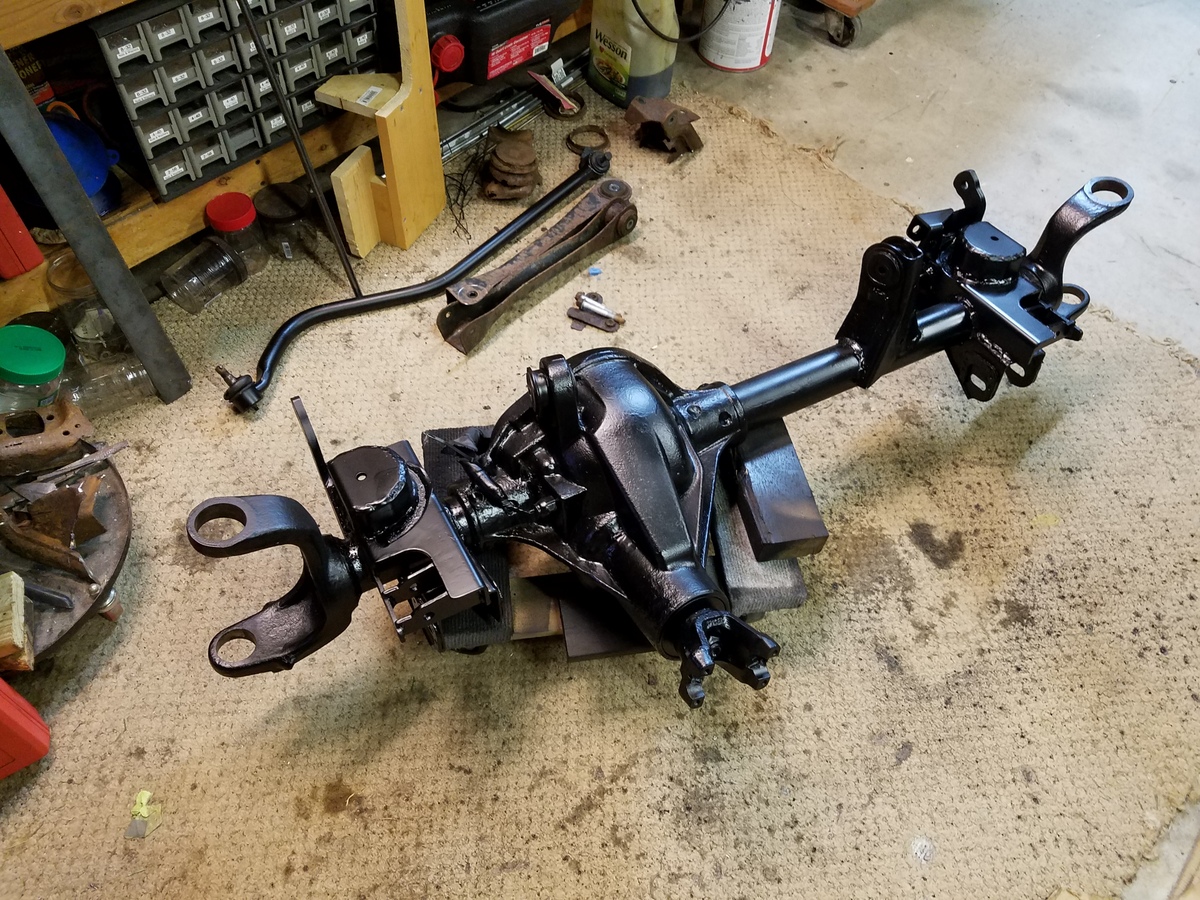
I got to this just in time. What you see below is the passenger side bracket which serves as a coil spring pocket, shock mount, track bar mount, sway bar mount and steering stabilizer mount.

Cutting off the remains involved cut off wheels, grinders, air chisels, and patience.

The control arm brackets were fine and cleaned up nicely
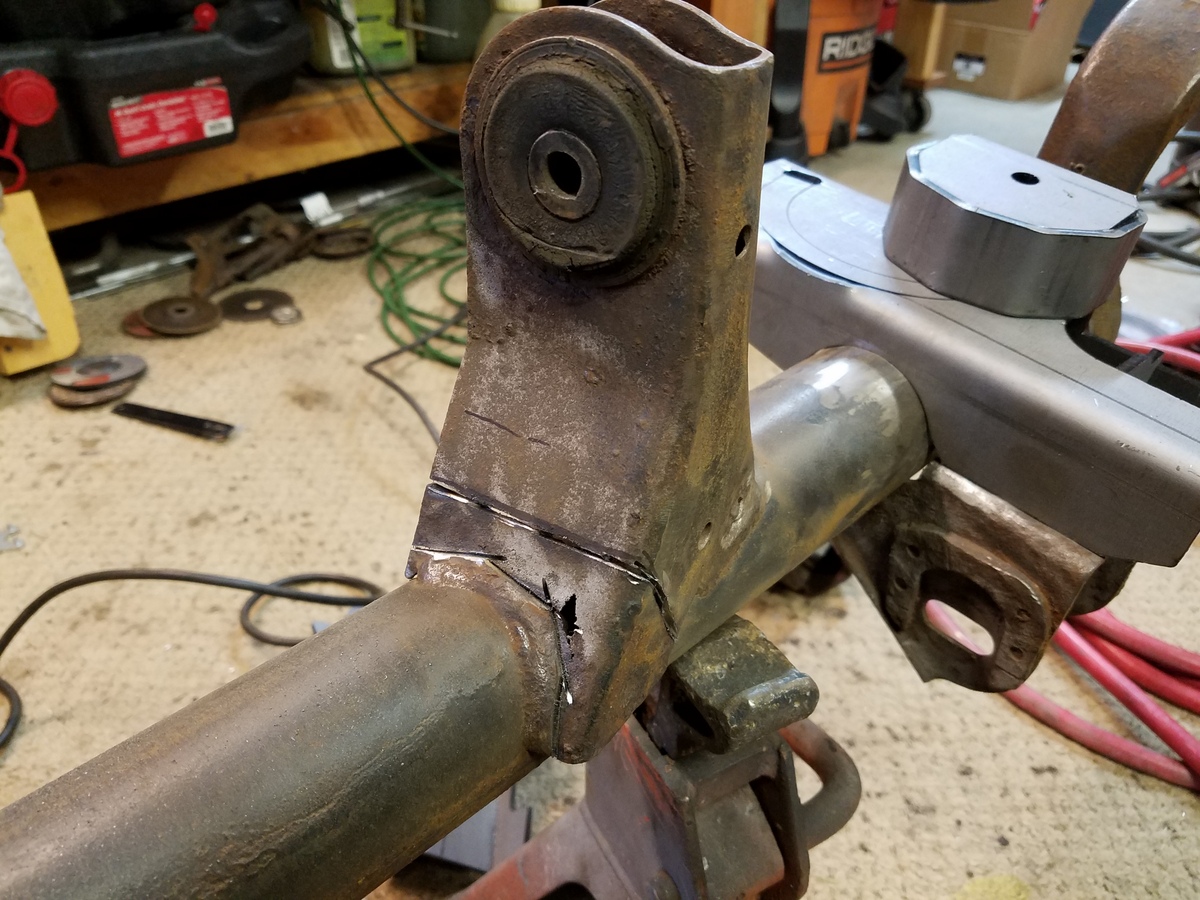
The vertical bracket for the passenger side upper control arm had some holes and paper thin areas. Here I've started to cut out a section:
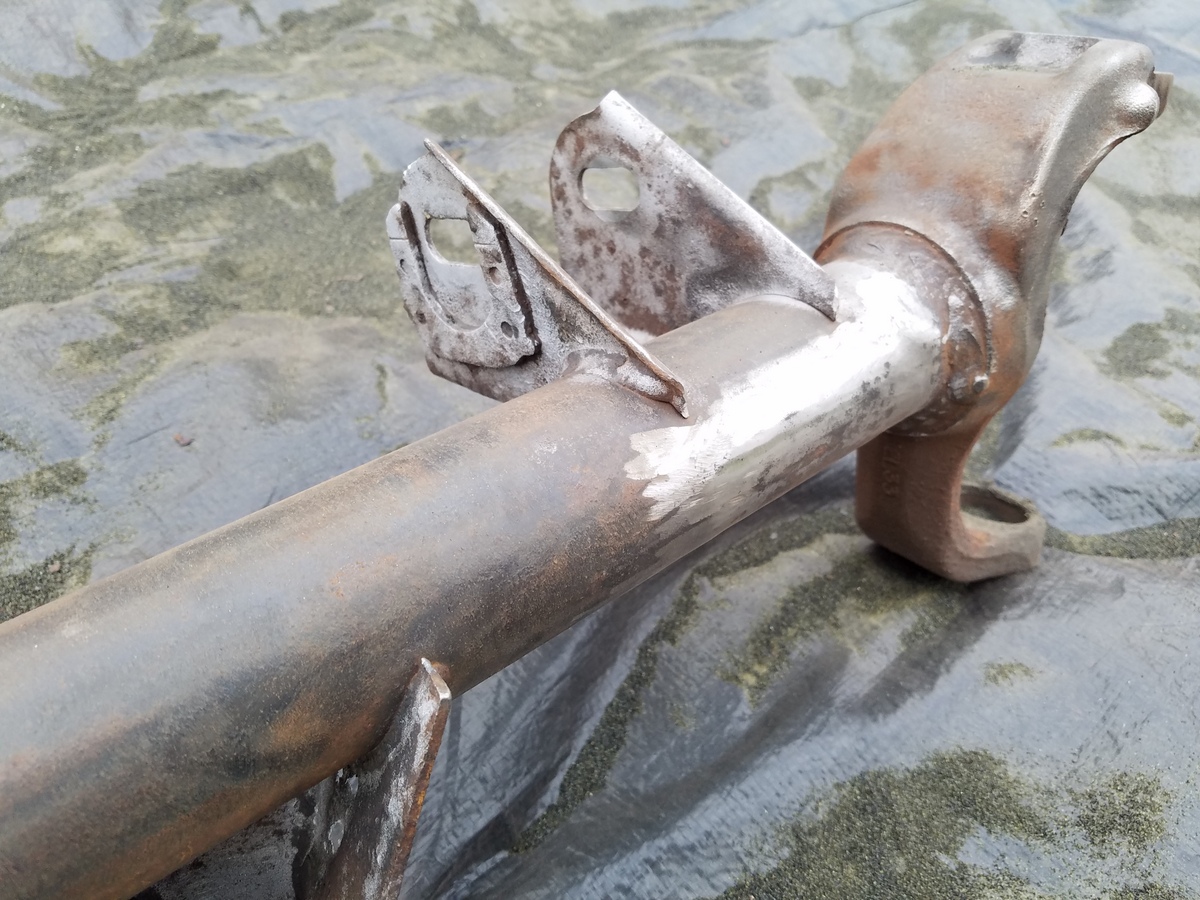
The rotted sections were removed and patched with 1/8 inch plate steel welded in with a borrowed 240VAC Miller MIG welder. That was a nice welder.
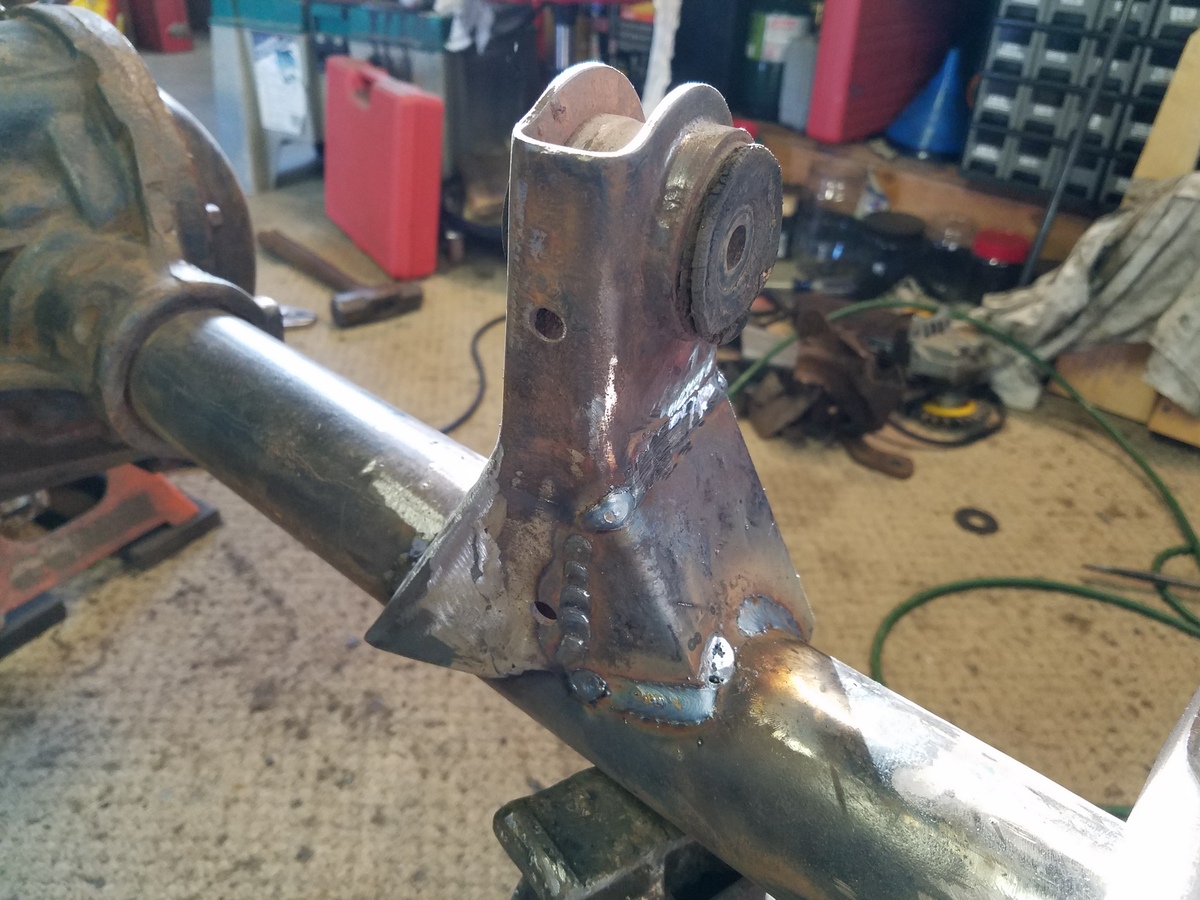
I ended up piecing in both sides and added a little fishplate as an extra measure.

Welding on New Brackets
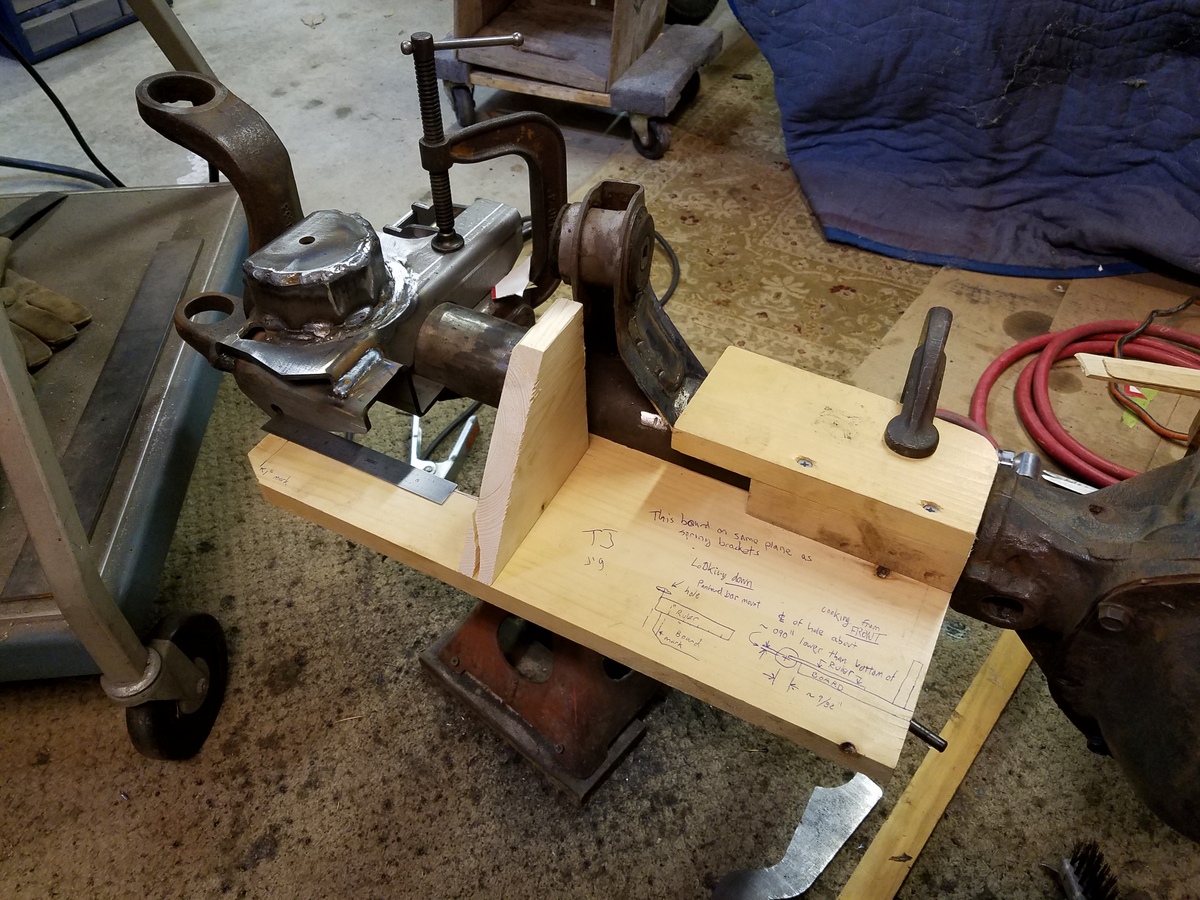
I had made a wood "jig" to use as a reference for all the original brackets. It fits onto the axle one way and serves as a reference to make sure the new brackets are spot-on. The jig was almost unecessary because the control arm brackets "nest" with the control arm brackets (which were undisturbed in my case).
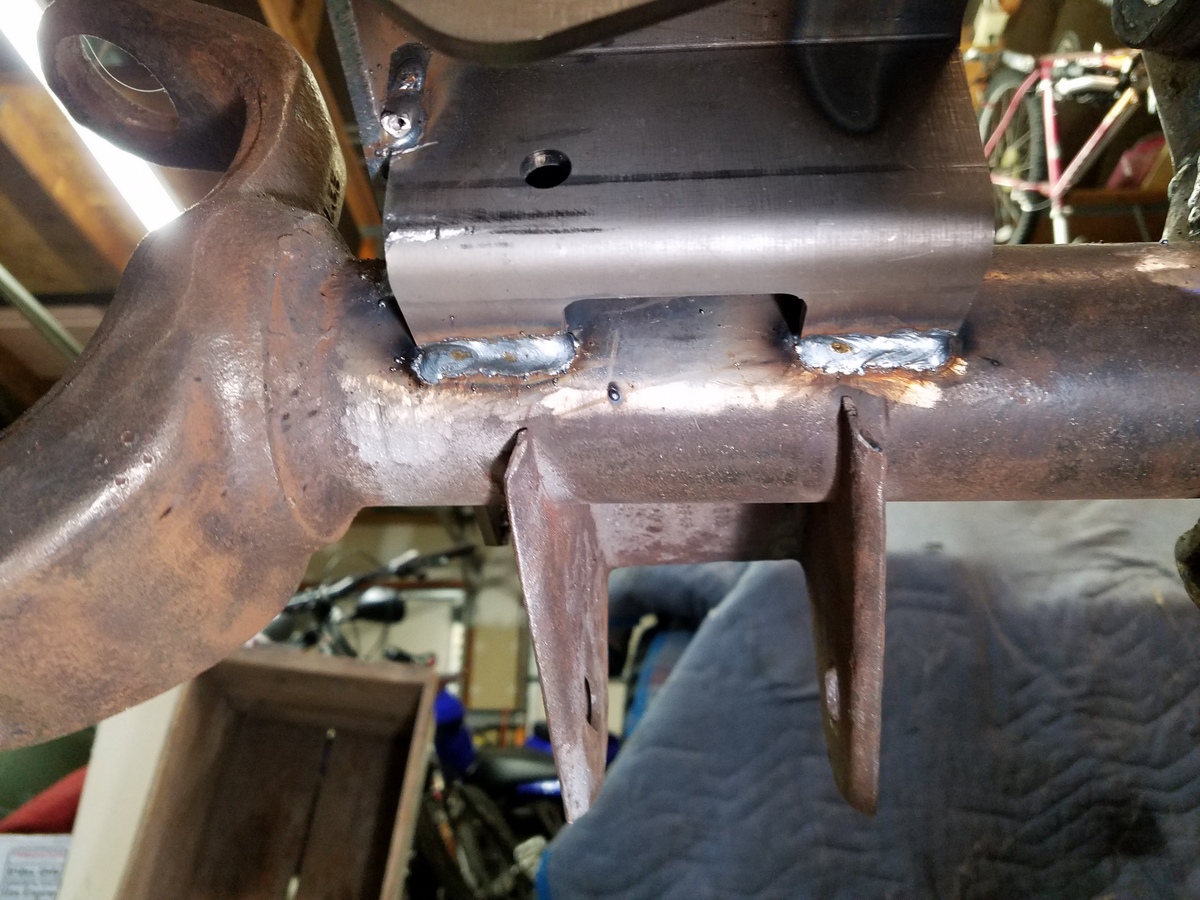
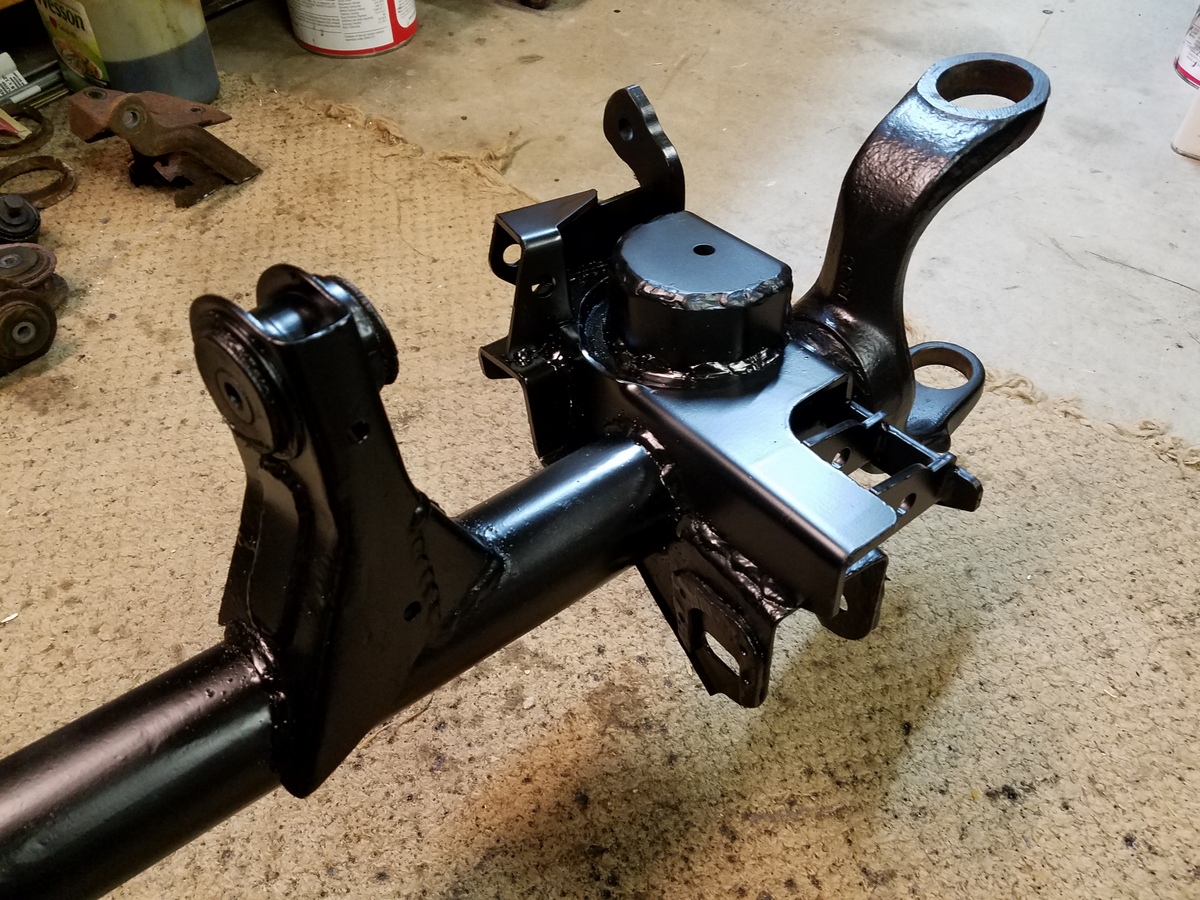
I used the 240V Miller MIG and welded everything up and was quite happy with the results.
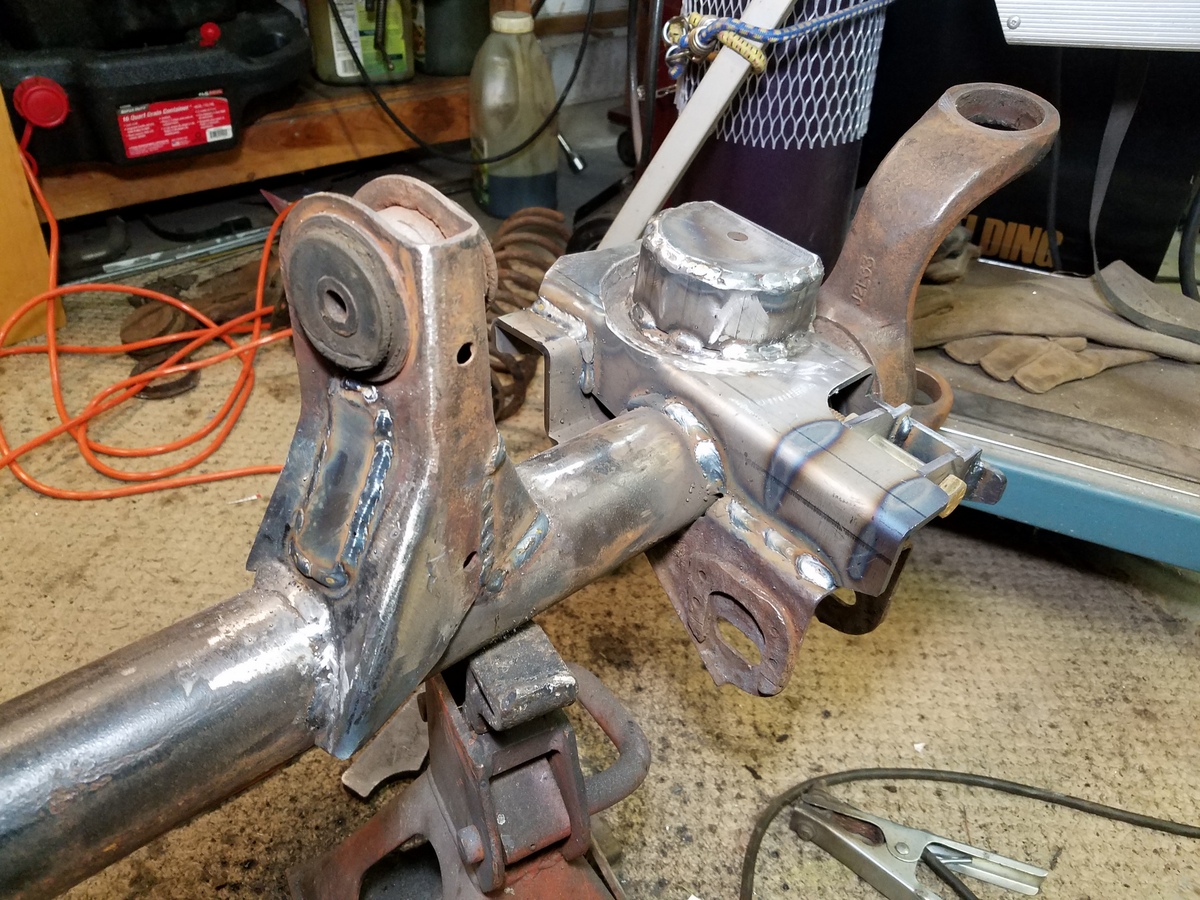
A separate piece goes onto the front....it's the track bar bracket. All the pieces are much thicker than the original gauge metal.
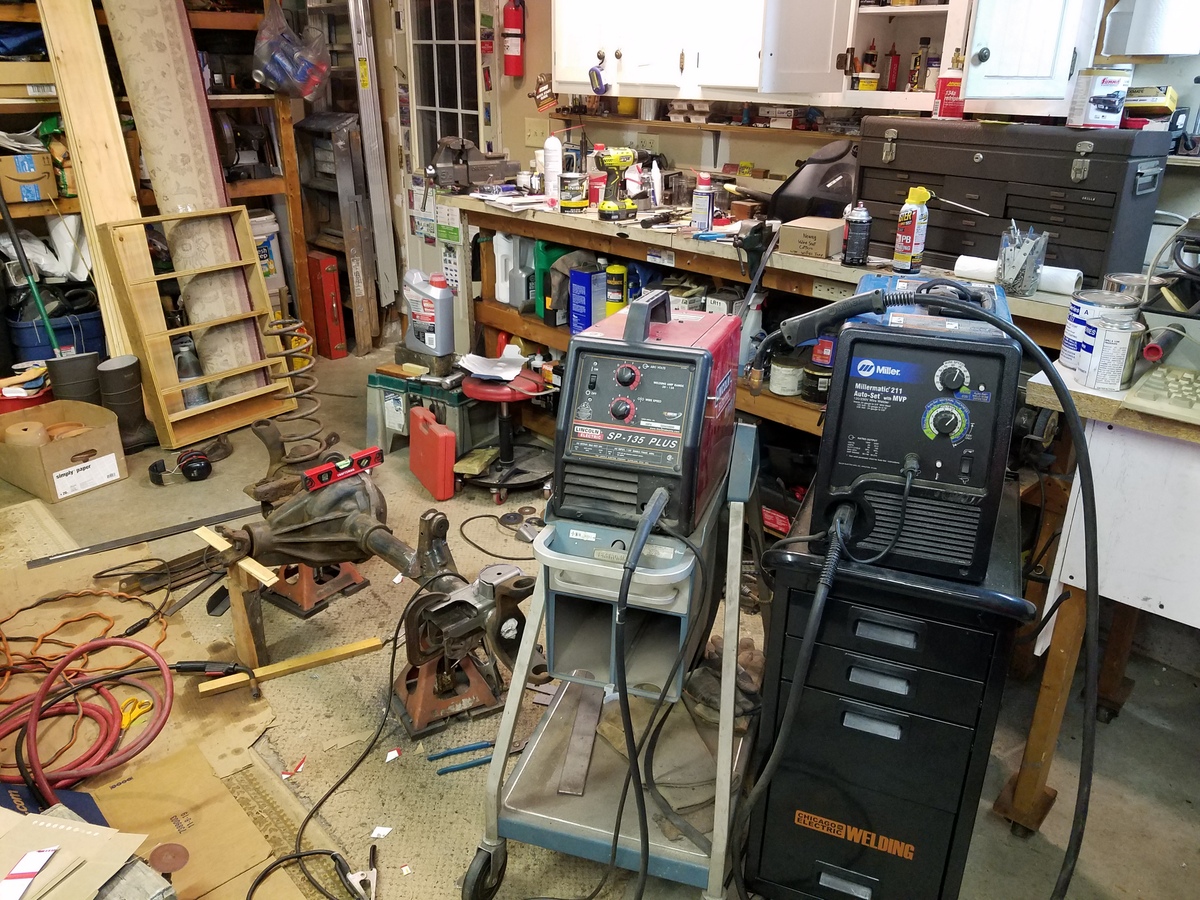
Here's my welding arsenal...my faithful Lincoln, and my neighbors Millermatic.
The rest of the axle cleaned up really well with a needle scaler, some grinding, and sand blasting. But I had to solve one more pesky problem...
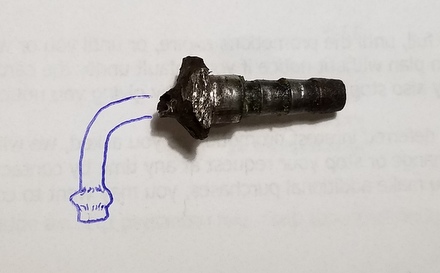
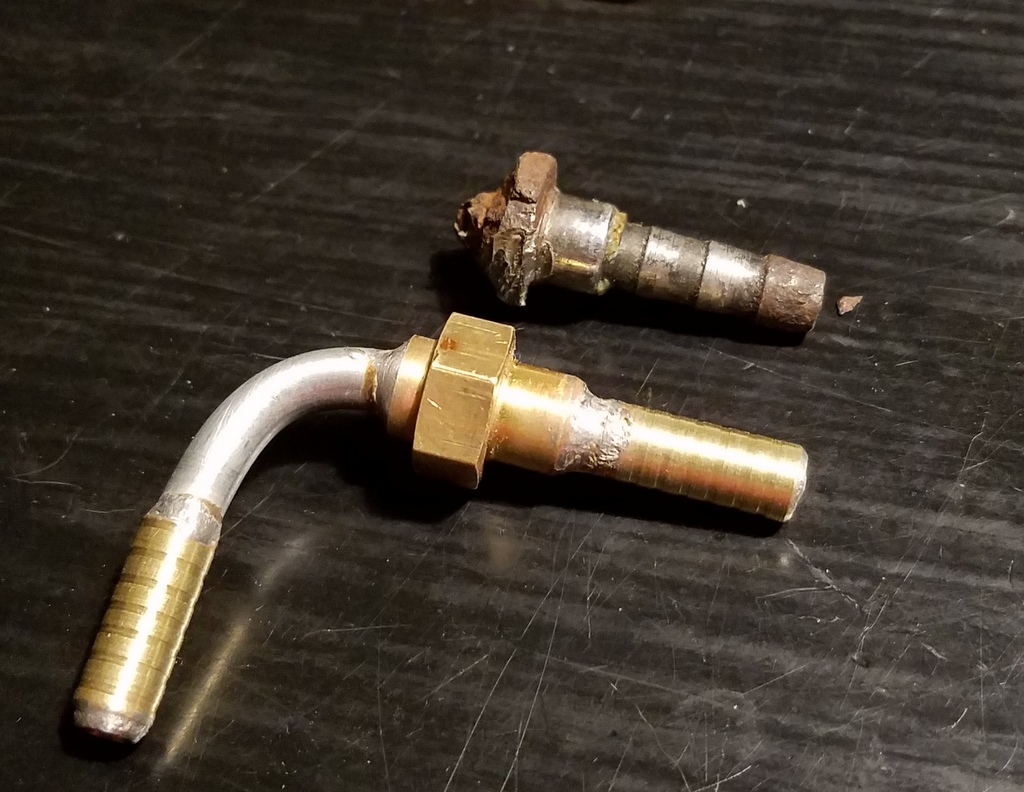
Air Locker Fitting
These early Rubicons feature air lockers that use an onboard 5psi air supply. An air line comes into a fitting at the top side of each diff housing. The front diff fitting rusted away. I couldn't recognize what the fitting looked like (or how it was installed), so I put a chisel to it, and whacked it out. I found out that rusty air locker fittings on Rubicons are also quite common. I sought out MOPAR replacements and learned they want $130 for that weenie hose barb part! In the image below, I've drawn in the missing rusted section...
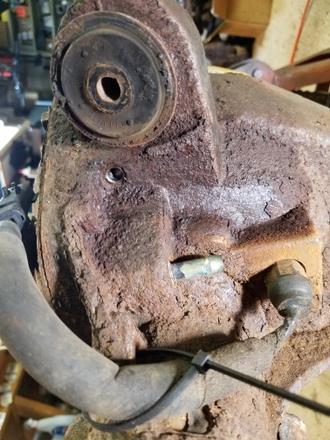
Here's the bore in the side of the axle case where that fitting resided (under the control arm bushing):
Rather than give my money to the (probably) many layers of middle men in the replacement parts supply chain, I decided to make my own fitting. I got a random brass plumbing fitting and machined away the pipe threads into a boss that will fit with a slight interference into the differential housing. I drilled the through hole to a size that allowed a brake line tube to fit and soldered it in place. The tubing O.D. is a bit too small for the hoses used inside and outside the diff housing so I soldered on some brass tube over both ends of the brake tubing. I cut shallow grooves into the brass to help retain the rubber tubing.
Amazingly most of the hardware for the suspension bits cleaned up nice...some sand blasting took care of the rust. But some hardware didn't make it through the disassembly so I got a set of used original nuts/bolts from a Wrangler part-out guy.
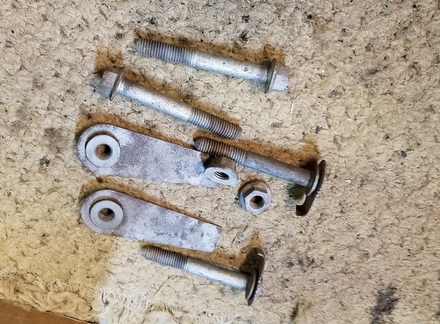
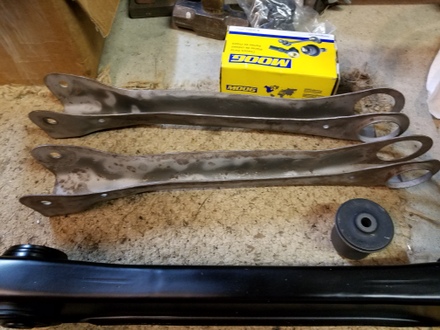
I replaced the bushings in the upper control arms and got all new lower arms... but I wish I had just gotten all new arms...it's cheaper than the bushings alone!
So I put in new knuckles, bearings, dust shields, axle u-joints, axle stub shields (hard to find for Rubicons!) and ball joints. I re-used the shocks, trackbar and tie rod assemblies. Those required de-rusting and painting.
The works were epoxy primed and semi-gloss overcoated.
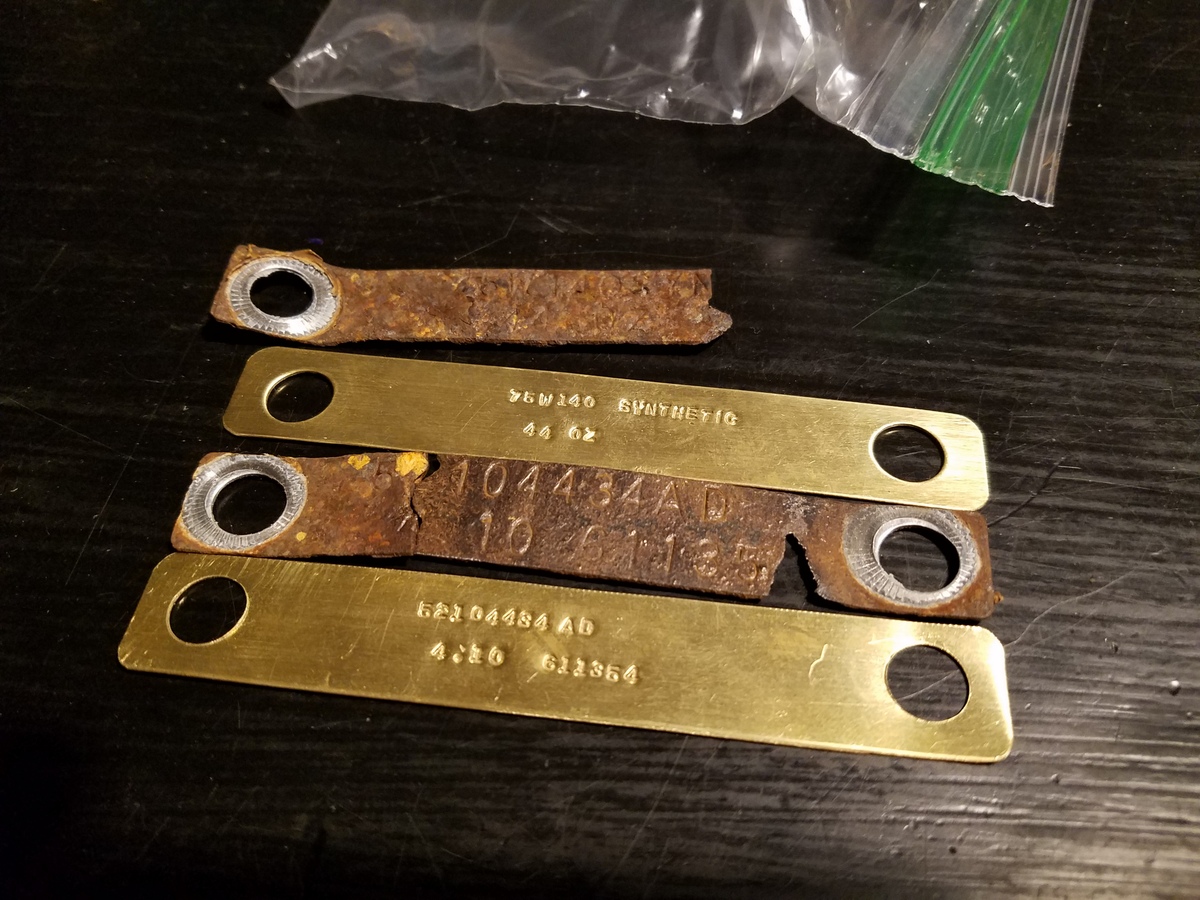
The tags affixed to the diff cover were made of steel...and rusted. There was enough left for me to copy the text and duplicate it on brass (albiet with a tiny stamping kit)...
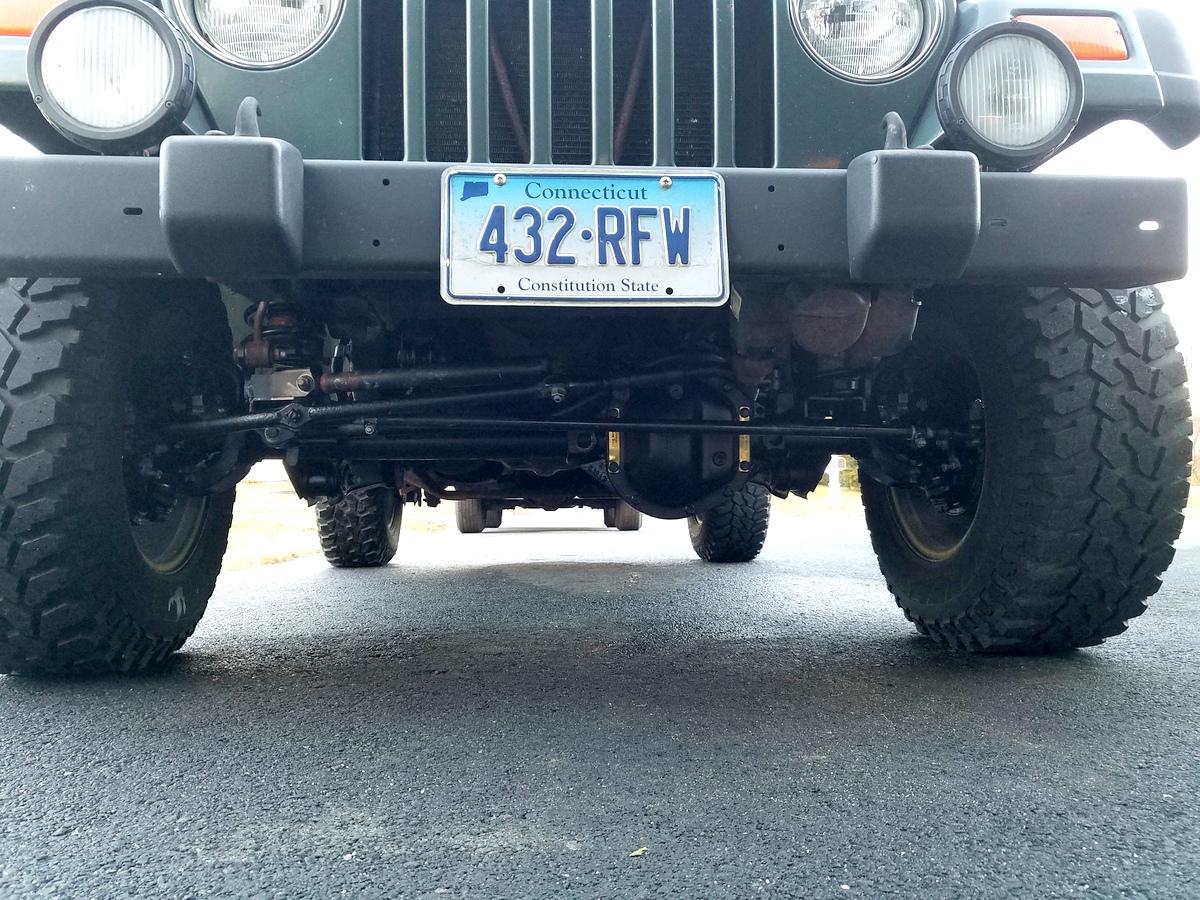
Finally I bolted it back into the Jeep. In some ways it's a bit of a let down as there was no real change in the look or feel of ride...it's just back to being safe.
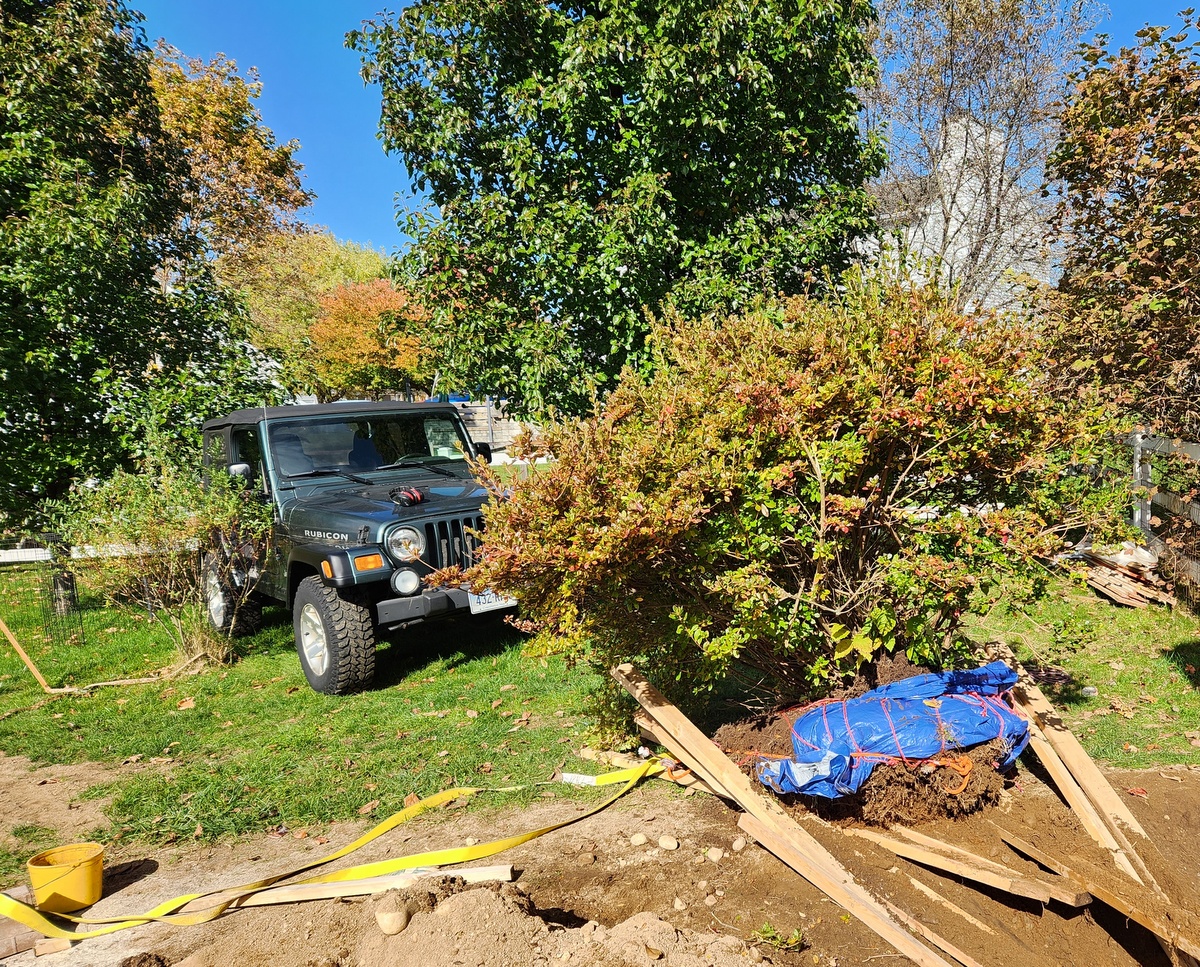
The Jeep doesn't get used much as I'd like. I've used it for pulling out bushes at various times. Holy jeez the 4 to 1 transfer case gets the gearing down for incredible pulling power.
After I did all the suspension repairs, a front caliper siezed up. I replaced them and while my wife was scooted up in the driver seat to reach the pedal (to pump them during bleeding) she noticed the windshield frame behind the dash was rotted...I kniew it had some rust, but when I took a look it was way worse than I thought...
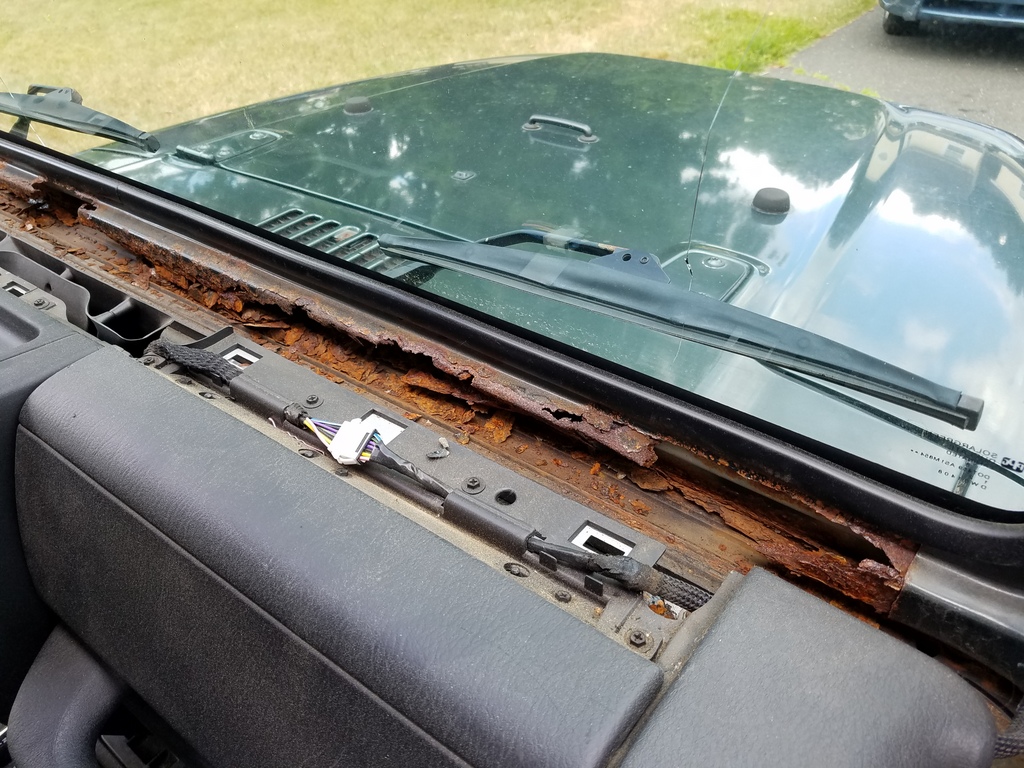
So, another round of work was instituted for the summer of 2022. I'm working on a write up for that soon!..WOoOp.
SFS
Links:
Willys Jeep CJ3A Forum
There exists a nice set of webpages for CJ3A's. It's got a forum too that caters to both '3A's and CJ3B's. It's a great resource, and frequented by very knowledgible folks.
1967 GTO Original Owner
These two videos feature an original owner GTO. This car was featured in Hemmings Muscle Cars magazine a couple years ago. Part 2 has inside and outside shots of the owner driving the car. Very nicely done.
Blues Maker
"Mississippi" Fred McDowell. One of the great Bluesman. This is a documentary made in 1969.
Pinstripes
Pinstriping the ol' fashioned way. Pretty nice.
MGB Racecar
I've always liked MG's. Watch this MGB lift it's inside tire a few inches off the tarmac when going "'round the bend". Awesome.
Pepsi Throwback
Pepsi has put out a "limited edition Throwback" version of Pepsi with REAL sugar, instead of high fructose corn syrup which has been used since the 80's. Holy cow there IS a difference; it's WAY better. Find some quick!